Showing posts with label Pumpkins. Show all posts
Saturday, September 1, 2012
Pumpkin Kit Winner
Thanks to everyone that entered to win the cute 4X4 pumpkin kit. If you didn't win, remember, you will have several more chances to win other kits over the next 6 weeks.
The winner is:
Shae
I sent you an email, so be sure to look for it and get back to me so I can get you your prize!
Wednesday, August 29, 2012
Teaming Up-{Weekly Challenge & Giveaways!}
I am really excited to bring you a new series that will be starting today and going for the next seven weeks! I am teaming up with several other bloggers to bring you some fun new kits from FabDecor.com! These are perfect for decorating for fall because not only are they stinking cute, they are really inexpensive and easy to make! Those are my kind of projects. Let's get started with challenge #1!

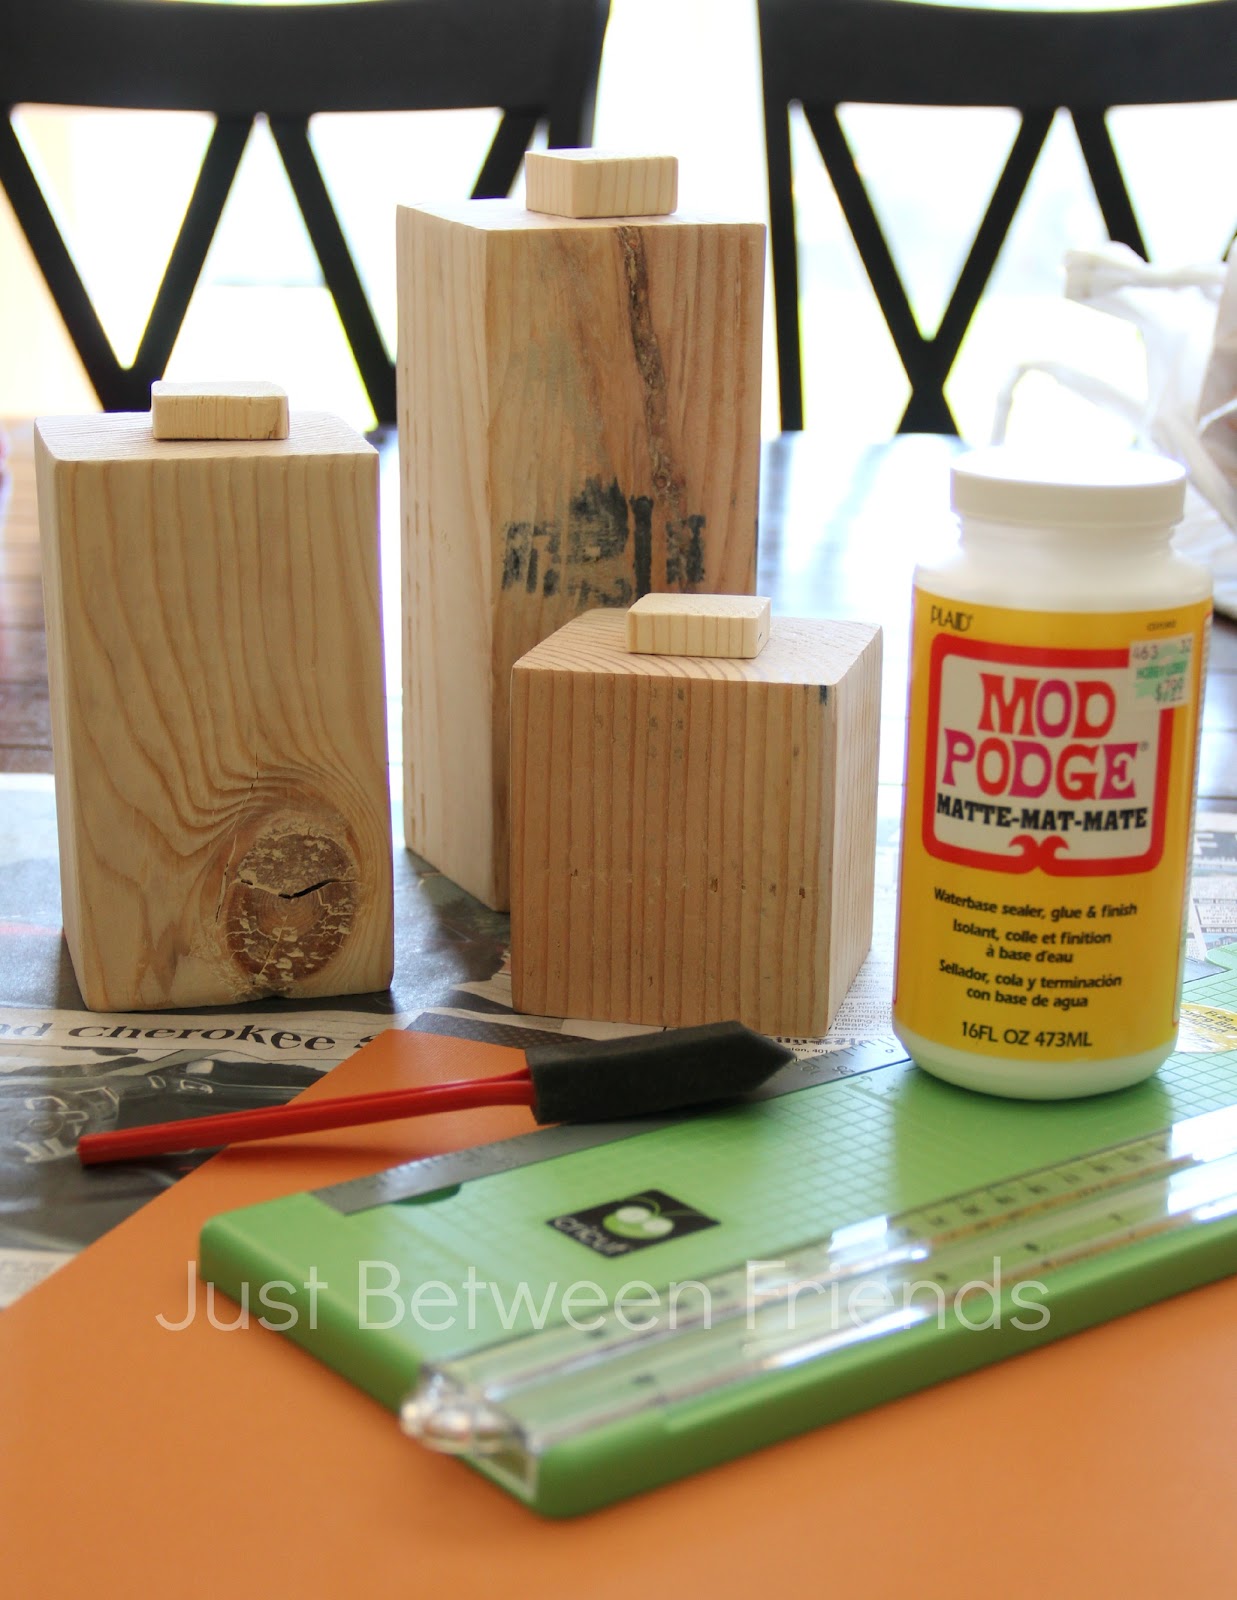
I was given three 4X4's along with toppers and the vinyl to complete this kit. A little info for you- You can purchase the DIY kit including all you need to complete this project for $12. You can also buy just the vinyl for $1.75 per face, or you can purchase an already completed kit at FabDecor.com.If you decide to purchase the kit, be sure to use the code SUMO for 25% off of your purchase. -OR- If you like free things you could also enter to win one at the bottom of this post!
"There are no mistakes, only happy accidents." At least that is what went through my head while I was making these pumpkins. I was so worried that I had screwed up my pumpkins. Let me explain. I began by using some textured cardstock and some mod podge. I glued the cardstock to the wood and was going to leave it there. It looked funny, so I tried to take it off and start over. The problem was I had waited too long to take off the paper. When I tried to pull it off, my happy accident occurred. :) Part of the paper was completely glued to the wood.
Don't you love the texture that the ripped paper leaves on the wood? I thought it was great and just went with it. To duplicate what I did, all you need to do is cut a piece of cardstock to fit the side of the pumpkin. Mod podge it in place and then let it dry. When it is mostly dry, peel the paper off and see what happens. Every side will look different, and trust me, it will be ok.
Once the paper was all good and ripped, I used a wood stain and rubbed it onto the sides and then put just a little swipe on the paper as well. Just remember that if you leave the stain sitting for too long, it will darken and you won't be able to wipe it off. Also, if you put any on the paper, you can't rub it off, so add in light layers with a teeny tiny amount of stain on your rag.
To do the topper, I used a brown polka dot cardstock and simply cut a square for the top. Mod podge it on, and then use the stain around the sides. A little hot glue to hold it in place and you're done!
The only step left is to add the cute faces to the front. Here's what you get when you are done. One side with the plain pumpkin and one side that is perfect for Halloween with the Jack-O-Lantern faces.
I think they turned out so cute and am so excited to use them for the fall! If you would like to see what the other bloggers did, you can go check out the post on the FabDecor blog- Fablifyit.com. There will also be FOUR other pumpkin kits being given away over there.
Want to win one of your own? Enter in the Rafflecopter box below. You will have until Saturday to enter and the winner will be announced then. Good Luck!
a Rafflecopter giveaway

I was given three 4X4's along with toppers and the vinyl to complete this kit. A little info for you- You can purchase the DIY kit including all you need to complete this project for $12. You can also buy just the vinyl for $1.75 per face, or you can purchase an already completed kit at FabDecor.com.If you decide to purchase the kit, be sure to use the code SUMO for 25% off of your purchase. -OR- If you like free things you could also enter to win one at the bottom of this post!
"There are no mistakes, only happy accidents." At least that is what went through my head while I was making these pumpkins. I was so worried that I had screwed up my pumpkins. Let me explain. I began by using some textured cardstock and some mod podge. I glued the cardstock to the wood and was going to leave it there. It looked funny, so I tried to take it off and start over. The problem was I had waited too long to take off the paper. When I tried to pull it off, my happy accident occurred. :) Part of the paper was completely glued to the wood.
Don't you love the texture that the ripped paper leaves on the wood? I thought it was great and just went with it. To duplicate what I did, all you need to do is cut a piece of cardstock to fit the side of the pumpkin. Mod podge it in place and then let it dry. When it is mostly dry, peel the paper off and see what happens. Every side will look different, and trust me, it will be ok.
Once the paper was all good and ripped, I used a wood stain and rubbed it onto the sides and then put just a little swipe on the paper as well. Just remember that if you leave the stain sitting for too long, it will darken and you won't be able to wipe it off. Also, if you put any on the paper, you can't rub it off, so add in light layers with a teeny tiny amount of stain on your rag.
To do the topper, I used a brown polka dot cardstock and simply cut a square for the top. Mod podge it on, and then use the stain around the sides. A little hot glue to hold it in place and you're done!
The only step left is to add the cute faces to the front. Here's what you get when you are done. One side with the plain pumpkin and one side that is perfect for Halloween with the Jack-O-Lantern faces.
I think they turned out so cute and am so excited to use them for the fall! If you would like to see what the other bloggers did, you can go check out the post on the FabDecor blog- Fablifyit.com. There will also be FOUR other pumpkin kits being given away over there.
Want to win one of your own? Enter in the Rafflecopter box below. You will have until Saturday to enter and the winner will be announced then. Good Luck!
a Rafflecopter giveaway
Monday, November 7, 2011
fall wreath
About a week after I had my daughter, my mom brought me all of the things I would need to be able to make a wreath for my front door. We had been talking about what kind of wreath we should make for a while and so we both made one. Here is what mine turned out like:
I used a nice green moss next to cover the burlap. The easiest way to get the moss to stick was to cover a section of the burlap with some hot glue and pat the moss down on it.
Next, I hot glued some pumpkins onto the moss. the finishing touch was adding a big burlap bow to the top. The best way to get it to stay exactly the way I wanted it to was to use straight pins. It was so convenient.
Here is how I made it:
I started out with an old nasty water noodle. I duct taped it into a circle and used it as my wreath form. Super cheap and super easy. It worked like a charm!
Next, I wrapped the wreath in burlap so that none of the wreath form was showing.
I used a nice green moss next to cover the burlap. The easiest way to get the moss to stick was to cover a section of the burlap with some hot glue and pat the moss down on it.
Next, I hot glued some pumpkins onto the moss. the finishing touch was adding a big burlap bow to the top. The best way to get it to stay exactly the way I wanted it to was to use straight pins. It was so convenient.
To hang it, I simply used a strip of burlap and some thumb tacks. I tacked it to the top of my door.
I love it because I can leave it up through October and November without having to change anything.
Wednesday, September 28, 2011
POV {Autumn} Feature
Wow! There were so many fun projects linked up this month! I think my to-do list just doubled. Fall really is my favorite time, so it got me all excited to start decorating for fall looking through all of the projects. Here is one of my favorites from the party.
Creation Corner linked these fun fabric pumpkins up. I think they are just darling. The fabrics she chose are so fun and her tutorial looks so easy to follow! Go check it out and give it a try. These would be so fun to put anywhere in your house during this fall season.
Thanks for linking up Tasha! Feel free to grab a featured button from my sidebar.
You should all be so excited for next month's theme. drum roll please.........BURLAP! It seems to be all the rage around blog land and it should be fun to see what you can come up with. So get started on those projects and get ready to link them up on the 28th of October! Can't wait to see what you come up with!
Tuesday, September 28, 2010
Fall-i-fy Your Porch #3
Buying the perfect pumpkins:
If you were to ask my husband, he would say that the bigger the pumpkin the better. I know there are a lot of people that would say that, but not me. Especially when it comes to putting them on my porch. I am a little more practical when it comes to decorating my porch. (Here is my disclaimer to this post: I am in no way claiming myself to be an expert and a lot of what I say may be common sense. Just in case there is someone that is interested though, I will write this post.) Let's begin.
1. Height is probably the biggest factor I take into consideration whenever I am decorating anything. I like to have things at different heights to add interest. The same goes for Pumpkins. If you place them at different levels or have different sizes of pumpkins it makes your finished product look finished rather then just randomly placed.
*****All images are from a google search I did. I did not take any of them. *****
If you were to ask my husband, he would say that the bigger the pumpkin the better. I know there are a lot of people that would say that, but not me. Especially when it comes to putting them on my porch. I am a little more practical when it comes to decorating my porch. (Here is my disclaimer to this post: I am in no way claiming myself to be an expert and a lot of what I say may be common sense. Just in case there is someone that is interested though, I will write this post.) Let's begin.
1. Height is probably the biggest factor I take into consideration whenever I am decorating anything. I like to have things at different heights to add interest. The same goes for Pumpkins. If you place them at different levels or have different sizes of pumpkins it makes your finished product look finished rather then just randomly placed.
2. Color can make things more inviting and more pleasing to the eye. Fall is a great time for color, so why not use the colors you have. I usually buy green, yellow and orange pumpkins. This year I found some really cool white and orange striped ones that I am so excited to use.
3. Shape can also help with the height factor. I like to get a tall skinny pumpkin, a round plump pumpkin several small ones, and I usually let my husband get one really big one that we can carve later. I just like the variety. I usually get quite a few little ones actually because you can stack them and fill in those "cracks" that are just missing something.
(Now that our porch is bigger, I am planning on buying more pumpkins than we have been able to in years past.)
Keep these simple ideas in mind as you go buy your pumpkins. I hope it was helpful. If you have any other ideas, please leave a comment for everyone to see so that we can help each other out. I know I would love to hear it!
****As a side note, I like to help the local farmers out by buying my big pumpkins from them. They usually have a great selection and are far less expensive than, say, Walmart. So it is a win-win situation. (If you live in Lehi, go to the Evan's Family Farm. That is where I got mine. They are conveniently just down the street from my house. Email me if you need directions)
While you are out buying your pumpkins, start collecting your other items as well such as the Corn Stalks and Straw Bales. We are almost ready to put the porch together. I can't wait to show you the final result. I think you are going to be happy with your charming fall porch makeover. I plan on having my porch finished by Friday, so make sure to get your stuff ready to go by then!
*****All images are from a google search I did. I did not take any of them. *****
Subscribe to:
Posts (Atom)