Showing posts with label gifts. Show all posts

Tuesday, November 13, 2012

Where Have You Been?!?!

Some of you may be wondering, "Where the HECK have you BEEN?!?!"  I mean, come on.  It has been since Halloween that I posted.  Yes, I am hanging out in the blogging slacker pile....BUT I haven't just been doing nothing this whole time.  I promise.

Let me tell you what I have been up to.  My husband was gone for 8 whole days.  He went hunting for white tail deer in Missouri with his best friend.  Now, those of you that know me well know that when he is gone, I take it as a perfect opportunity to do something BIG in our house.  This year was no different.  I can't wait to show you the space that I worked on, but I will get to that starting tomorrow.

Here's a couple of other things that happened.  I made this for my sister in law for her birthday.  I got the kit from The Wood Connection and love the way that it turned out.  The model they had on display had the Grinch facing backwards so you wouldn't have to do the face.  I thought it would be much more cute with the face painted on, so I did it instead and am loving the way it turned out!  As an added bonus, my sister in law loves it too and already has her Christmas decorations up.  :)


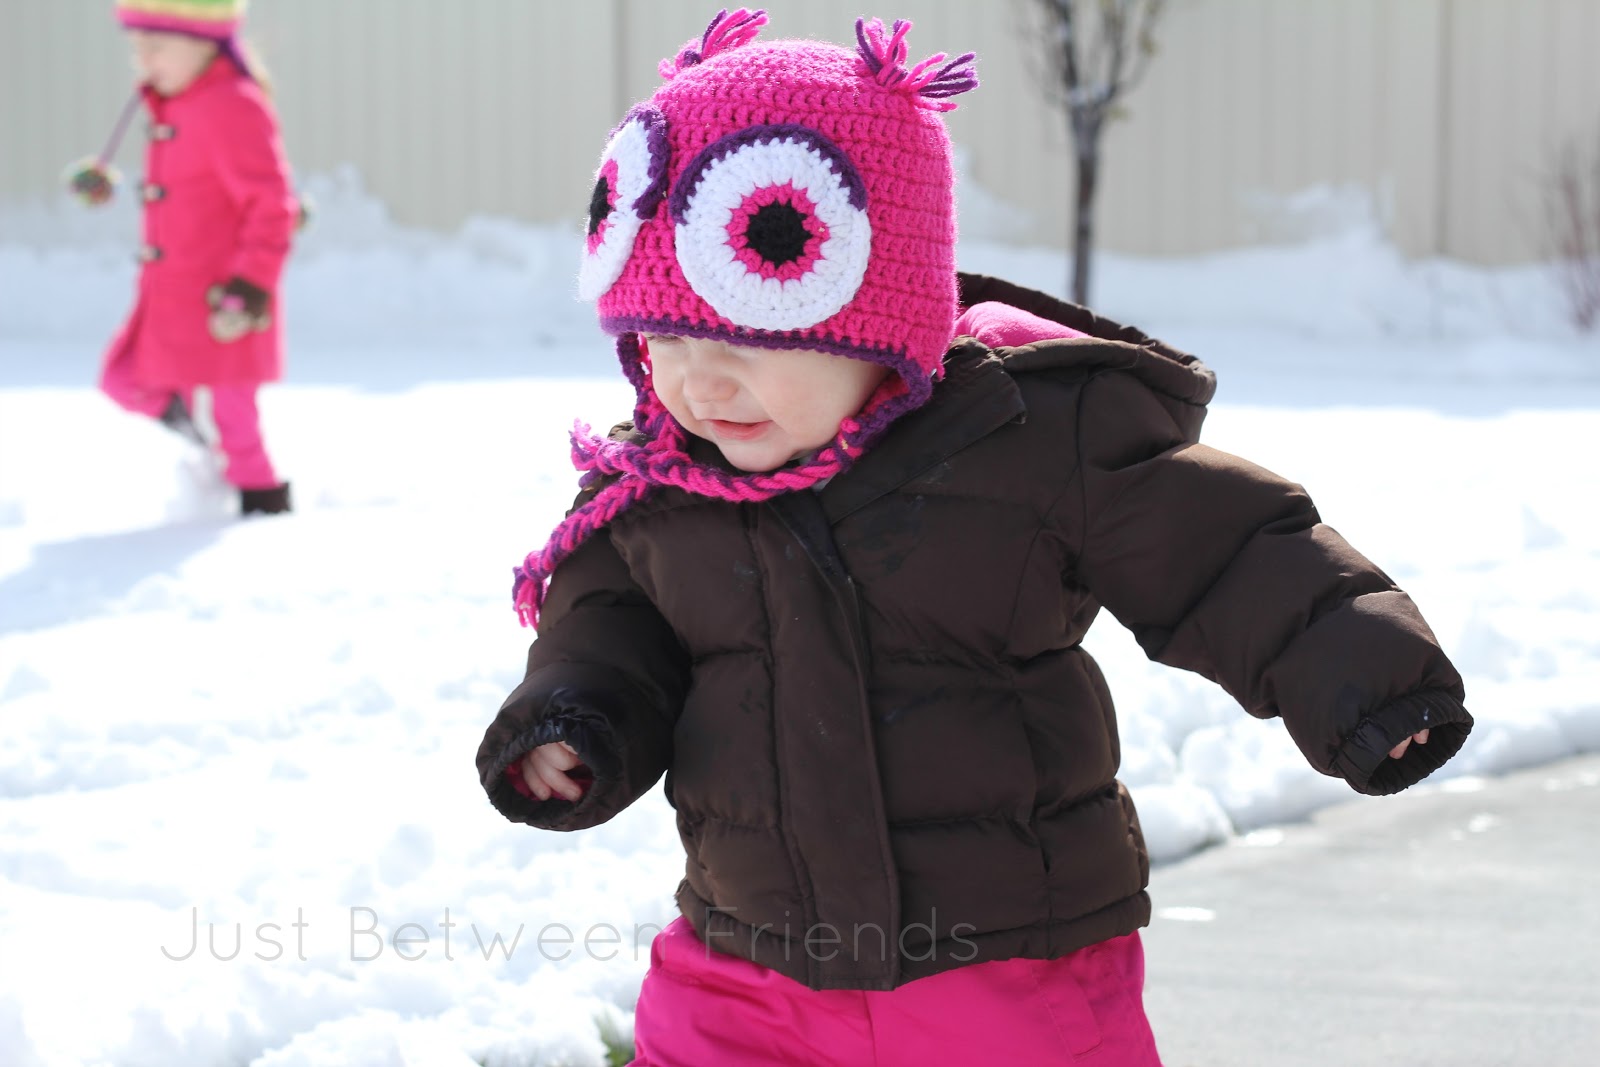
It snowed here in Utah.  Like a lot.  Overnight.  When the girls woke up and saw the snow, they wanted to go play in it.  I suited them up and let them head out.  Lillie loved it.  Addie didn't.  This is the only smile I got.  After this, Addie sat down and cried.


When Addie started to cry, I brought her in and we enjoyed the snow inside while Lillie played outside.  It was far more enjoyable to watch Lillie throw snowballs at the window.  Addie thought it was hilarious and would laugh and laugh every single time the snow hit the window.


 This is where the events of the last week or two become not. fun. at. all.  We all got the flu.  It was a messy, smelly, and down right awful flu that I am just hoping is gone today.  It has been plaguing us since last Thursday and I am ready for it to be gone.  This photo was taken after a very long night of being sick.  I hate seeing my babies hurting so much!


Now that we are on the road to recovery (fingers crossed) I am hoping that I can get back to normal posting again.  I do have something HUGE in the works for YOU that I can hardly wait to tell you about, but that will have to wait another week.  (Just be excited.)  

That pretty much brings you up to speed on life right now.  I hope you'll stop by tomorrow when I start showing you the BIG project I have been working on.


Pin It!

Wednesday, September 26, 2012

Gifts for the Bakers

For those of you that have been keeping track based on the photo I showed in the first post, we aren't exactly done showing all the different gift ideas.  In fact, I have quite a few left.  So, I will be finishing them up this week for sure.  If you want to make sure that you haven't missed any posts, check back to the first post because I will have links to all of the gifts over there.  You could even pin it for later just so that you have all the gifts in one spot.  Just sayin.  I'm trying to make your life easy over here, ok.


This next gift that I wanted to share with you is one that can be personalized to include so many different types of gifts.  We wanted to show you what to include as a gift for someone that loves to bake.  You will start out with a container with a lid.  We got this one from the thrift store but it was a silver color.  To make it cute, we mod podged paper to the front, used washi tape around the edges, front, and handle, then added ribbon and a cute birthday button to the front.  It is a really quick and cute way to decorate it.


Now that the outside is looking cute, you need to fill it with cuteness!  We went with cupcake liners, sprinkles, candles, and a small cake spatula.  This is a really inexpensive gift that is personalized and fun.


Like I said before, this gift can really be changed to match anyone and their likes.  If you know someone that loves to garden, you could fill the box with seeds, gloves, gardening shovel, etc.  Another idea is if you know someone that loves to craft.  You could put washi tape, mod podge, glitter, scissors, and paint into a box and give it to them.  There are just so many different ways you can use it!

What would you use this for?

Pin It!

Monday, September 17, 2012

Box of Sunshine


Last week I wrote a post recommending some children's books, so I am not going to double do it this month. Instead, I'm going to do something that I will probably never do again and write a whole post that has nothing to do with books. The week before last my husband and I wanted to send a package to some loved ones to brighten their week a little. This idea I had seen on Pinterest came to mind. I loved how simple and cute it is. I am not a crafty or creative person and I like that it's so straight forward: even I can handle it. The basic idea is that you gather yellow things, put them in a box, and call it a box of sunshine. Win-win-win.  We had a lot of fun searching for yellow items to use. Our package turned out really cute. Shortly after we sent that off, I found out about the gift-giving class and decided to make a mini version.

I got a little box from the gift wrap section at Hobby Lobby for 69 cents, along with some yellow tissue paper. I filled the box with yellow treats, then printed out a little label, and used a couple glue dots to stick it to the box. I really like how it looks.


Here's what I put in my box:

  • M&M's
  • Toblerone
  • Ferrero Rocher
  • Burt's Bees Chapstick
  • Country Time Lemonade packets
  • Lemon drops (I bought a bag at Target for $1, then put them in a little Mason jar, tied a bow around it and stuck some cute scrap book paper to the lid.)


This is a fun gift for any reason, or no reason at all. If you want to step it up a notch you could add a gift card. The only company with a yellow giftcard I could think of off the top of my head is Subway, but you can wrap yellow scrapbook paper around any card to make it fit your theme. This gift can be as inexpensive as you want/need it to be and still be thoughtful. Anyone would love to receive this gift. I know I would.


Pin It!

Saturday, September 15, 2012

DIY Photo Books

Photos are a gift that any grandparent would love to get.  I know my grandparents do!  They are a way for them to see a little glimpse into the day to day stuff and a way to show their friends and visitors their favorite people.  I have heard these books called brag books, and some just photo books, but whatever they are called, they are cute, easy to carry around or store, and so easy to make!


Let's get started.  I love instagram.  I decided that I wanted to use the photos from my instagram in the book since they are photos of the silly day to day things that I knew the grandparents would love to see.  I thought it would also give them a laugh.  I mean, who wouldn't when you saw pictures like this? :)


I started by putting my photos into a 12x12 square using photoshop. If you don't have photoshop, don't worry.  You can still make this!  All you will need to do is print your photos as a 4x6 and then cut them down to size.  You can follow the rest of the tutorial from there.


The photos are 3 inches square.  I cut them apart using a paper cutter to get really straight lines.  


Next, I cut some cardstock to be 3.5 inches square and mounted the photos to it so that they have more of a framed look.  Plus I really liked having the contrast between the paper behind the photo and the paper used for the actual book pages.


The pages of the book are going to be 4 inches square.  Once you have the photos mounted to the 3.5 inch square pieces, you will mount them to the 4 inch pieces of paper.  I put the photo a little to one side to account for the book spine being put in place.  

All you need to do now is embellish the cover a little.  I took a pretty piece of scrapbook paper and attached it to the front.  Then I used one of my favorite things-washi tape-as a border of sorts and used a mini alphabet stamp kit to write the word "moments" on the front.  The very last step is to bind your book.  I used my dad's book binder.  If you aren't fortunate to have one available to you, don't even worry about it.  You can take it to your local Kinkos, or other print shop and they will do it for you at a really reasonable price.  


There you have it!  A really cute, personalized, and fun gift to give to grandparents (or aunts and uncles, or anyone that would enjoy seeing photos of your family).  I originally wanted to get these to my grandparents for grandparents day (which was last Sunday) but the stars did not align and they didn't get them.  They will be getting them shortly though, and I know they are going to love them.


Pin It!

Thursday, September 13, 2012

Easy Christmas Gifts

I realize that Christmas is a long way away, but why not start planning now for the holidays?  These ideas are some of my favorite that I have ever seen as far as neighbor gifts go.  I even have FREE PRINTABLES to go along with them!  It doesn't get any easier for you than this!


This first one is my all time favorite.  "You're gettin "Muffin" for Christmas."  Seriously clever, right?  I didn't come up with the saying, but I did make the printable.  Just click the link below to print your own tags.  I used the yummiest muffin mix out there.  Ghirardelli double chocolate muffins to be exact.  They are yummy! Plus who wouldn't love a nice chocolately muffin?


To make it a little nicer than just slapping a label on a box, I used some brown packaging and wrapped it around the box so that you could still see that it was a muffin mix.  Then I used a rectangle of red card stock and attached it on top of the brown packaging.  Last, I tied some red bakers twine around that, and finished it with the printable.  It is a simple packaging, but one that I think looks really nice!

***Printables are for followers of Just Between Friends ONLY.  If you like this post, I would love it if you would follow along!

PRINTABLES:
You're Getting Muffin for Christmas
Twizz the Season to be Jolly


This next gift idea is another one that I think is SO clevah. (You know, like clever, but clevah instead.)  This is really easy to put together and really inexpensive.  All you need to do is get some ribbon, print off the printable (link above), and attach it to the licorice.  I did glue the printable onto some black card stock to give it a more finished look.  That's it!  So cute!


Pin It!

Wednesday, September 12, 2012

Book Gifting

As Jonie informed you, I participated in the gift-giving presentation last weekend. I'm pretty sure my role was to show you that don't have to be crafty to give nice, inexpensive gifts. My gift ideas centered around books. I know, right? You're shocked. Anyway, I showed a couple examples of books packaged in cute ways, but to be honest, my mom was the brains behind the cute packaging. I'm going to show you the packaging ideas as well as recommend a few titles that, in my opinion, make excellent gifts.

Baby Shower:
Who doesn't love beautiful, well written children's books? (Even if you thought of someone just now, I bet that person is not an expectant mother. Just sayin'.) We wanted to take a book and make it look like the thoughtful gift it really is. The ideas we came up with were:
Wrap a fun, brightly colored receiving blanket around the book, then tie a ribbon around the blanket. Voila- instant cute gift.


For smaller books, tie a ribbon around a book or two and add a rattle or another small toy.


Here are a couple picture books that Alice and I highly recommend:

It's Time to Sleep, My Love by Eric Metaxas and Nancy Tillman
This is an A for sure.

I got this book at Kohl's last December, shortly after Alice was born. My mom got her the little panda, also from Kohl's, for Christmas. I love this book. I have read it to Alice almost every night since I bought it. The illustrations are beautiful and she loves to stare at/pat them- that habit led to me buying the board book version from Amazon to avoid ripped pages. I love the gentle rhythm of the story which seems to help calm Alice down for bed.

Sidenote: If you have never noticed the Kohl's Cares books up by the cash registers, go check it out. I am in no way affiliated with Kohl's and they will give me nothing for telling you this, but at only $5 each you cannot find cheaper hardcover children's books. (If you can, let me know where!) They also sell stuffed animals that go with each book, which also cost only $5. You could buy a book and a stuffed animal and tie them together or just throw them in a little gift bag and you have a very sweet little gift.

Dear Zoo: A Lift-the-Flap Book
We give it an A


This book is approved not only by Alice and me, but also both of Jonie's girls. They were at my house last week and we read this book over and over at their request. It's a very simple book that has been around for thirty years. The narrator says he wrote to the zoo to send him a pet and each page shows a different animal the zoo sends, which the author then sends back until finally the zoo sends the perfect pet. The girls love lifting the flaps themselves and if you make the animal noises it's extra fun.

Christmas:
The Mansion  by Henry Van Dyke
This is an A+


      This is one of my favorite stories to read at Christmastime. It's lesser known, but has the same didactic vibe as A Christmas Carol. The main character, John Weightman, is a wealthy man with an important lesson to learn. He is not as miserly as Ebenezer (he owns a wing of the hospital, a grammar school, etc.), but he believes in getting recognition for any good deed he does: "No pennies in beggars hats! Try to put your gifts where they can be identified." He has a dream one night that teaches him what is truly important in life, and it's a good reminder for us all. The version I linked here costs only $2.34, which is less than the cost of most greeting cards. Idea: use this book in place of a card. It will hold more meaning and stay with the recipient far longer than anything Hallmark comes up with.
If you want to read the book yourself, you can download it free for your kindle here or get a free download in many formats here, courtesy of Project Gutenberg.

The Spirit of Christmas by Nancy Tillman
I give it an A


The author of this book is also one of the authors of It's time to sleep, my love. This is similar to that book in that the illustrations are beautiful and the words are soothing. I love the message it shares. It talks about the spirit of Christmas helping the narrator figure out what is missing from Christmas. He suggests bells or food or songs, but the narrator says that's just not it. It turns out that "you" are what's missing. The last page says, "And so then, my darling, wherever you roam, may you always be safe... may you always come home. For as long as the world still spins and still hums, wherever you are, and no matter what comes, the best part of Christmas will always be... you beneath my Christmas tree." If you have kids living away from home or any loved one who is far from you this season, this would be a sweet way to remind them that they are important and loved. I think a sweet note tucked or written in the cover along with a cute ribbon and an ornament or some chocolate would be just right.

Any Occasion:
We took an inexpensive cookbook, wrapped it in a dishtowel, tied a ribbon around it, added a cookie cutter and I think it's perfect for birthdays, holidays or just because. One thing I like about wrapping books this way is that it looks great and you already know what it is without opening it. It takes away that awkward should-I-open-it-right-now? moment.


You can always find cookbooks on clearance racks, so this can be a very affordable gift. Also, in addition to picture books, Kohl's always has a $5 cookbook up by the register.


Make a bookmark to personalize and beautify your gift. We found this tutorial for making gorgeous bookmarks out of ribbon and a single earring. You can see our version in the picture below. The cameo is a pin, so we just pinned it to the ribbon. The flower was attached with a glue dot, which holds surprisingly well. I don't think they are very practical bookmarks for use, but for displaying books, they make a beautiful statement.


Our other bookmark idea I don't actually have an example of... We thought it would be nice to give someone a book you love and make a bookmark with a favorite quote from the book. That way they get a little preview of the greatness that awaits them and it makes the gift that much more personalized.

The other book-related idea I have for you is framing book pages or illustrations. The frame in the above photo is one that hangs in Alice's room. It's an illustration from Alice in Wonderland. I found the picture using a Google image search, sent it to Costco to be printed, and stuck it in a frame. Anything you frame becomes more special. You could find a print from a book that has significance to your recipient and for the cost of a frame (which, as Jonie said, can be easily found at a thrift store and painted) plus the cost of a photo print (I think mine was 39 cents...) you have a meaningful gift.


My final tip for book-giving:
 Find awesome, old books. You could find an old edition of a book you know the recipient loves, or share an old copy of a book you adore. An aged, hardcover book has so much more character than your average mass-market paperback. And it smells better too. Where do you find them? I've found great books on eBay and sometimes the used section on Amazon. Check out local thrift stores or yard sales, sometimes you can score vintage books for next to nothing. Also, if you're in Utah, you should check out Weller Book Works up in Salt Lake. They sell new and used books and I just love that place.


Pin It!

Tuesday, September 11, 2012

Wedding Gift Idea

This is one of my favorite things to give as a wedding present.  (I accidentally just wrote weeding present. Good thing I caught that one.)  


It is easy to put together, useful for the newly weds, and it can be as personalized as you would like it to be.  Here's the break down of everything in the gift.  

You start with mixing bowls.  You can do just one, or you can give a full set.  In the photo, I have two bowls which made it easier to put things up where they could be seen.  Next, I have a cake mix, and last I have a recipe card holder with a stack of recipe cards that I printed out.  I actually got the recipe card holder from my mom who found it at the thrift store.  I sanded it, painted it and added vinyl.  Keep your eyes open for these because you can basically find them anywhere. The magnet was just one that I had on hand, and it worked perfectly to hold the cards in place.  If you would like to use the recipe cards that I made either for yourself or for a gift, you can find the link to the printable below.  Make sure to print onto card stock for better durability.

***Printables are for followers of Just Between Friends only.  I would love it if you would follow along if you aren't already!  Thanks!


You can make this gift even more personalized by including your favorite recipe on one of the cards and then instead of a cake mix, including all of the non-perishable items that you would need to make the recipe on your card.  


Other ideas would be to include baking items such as a bag of sugar, baking soda, baking powder, salt, or pretty much anything along those lines.  They are things that people don't really think about until they need to use them for the first time.  And, in my experience, the baking items tend to add up really quickly, so it is nice to have a base supply on hand. 
Pin It!

Monday, September 10, 2012

Giving Framed Art as Gifts

I have two fun ideas that would make great gifts that use picture frames.  They are really easy to pull together and make for a very personalized and cute gift.

This first idea was one my sister and I did for Father's Day this year as a surprise for our husbands as well as our dad.  It is pretty self explanitory and SO easy to put together.  I bought the letters at Hobby Lobby and painted them different colors.  The heart is a piece of pink felt that I cut to be a heart.  All you need to do is take a picture while holding the different parts of "We <3 U", print it out, and put it into a frame.  I got this frame at Hobby Lobby as well.  So for a total cost of $15, this was a really great gift that my husband brought to his office and enjoys every day. The good news is that you don't have to do it just for Father's Day.  You can use this idea for any holiday or birthday!


The next gift that I wanted to talk about is this fun photo holder.  My mom made this one, but she showed me how she put it together.  Here is a little mini tutorial for you.


You begin with an old frame.  This one is a little bigger than an 11X14 I think.  If you don't have an old frame on hand, you can get a frame at the local thrift store, add a coat of paint and use it just as easily.  You will also need some fun fabric, some sort of twine or jute, mini clothes pins, and cute photos.

My mom then got a piece of cardboard that was cut to the size of her frame.  Then she cut the fabric to the same size.  Next, she added some glue to the edge of the cardboard and placed the fabric in position. For this project, she used the elmers craft glue.  My mom said that it is pretty powerful stuff.  It isn't your typical Elmer's glue that you can use to peel off like skin. (You know you've done it before.)


Once it has dried, just use a staple gun to attach it to the frame.  Flip it over and use the staple gun to attach the jute to the frame.  There is no exact science to this.  Just put it wherever looks right.


Now you can add the photos of your cuties or leave it empty for the person who is receiving the gift to fill it up with cute faces.  It is a fun and personalized gift that anyone would love to get.  


Pin It!

Gift Giving for Every Occasion


Saturday, my mom, sister, and I taught a class on gift giving. Holy cow!  I have so many things to show you from the class! Seriously.  It is going to take an entire week to show you all the how to's, the links, and even some freebies that we talked about during the class.  When we were asked to teach the class, they told us that they wanted a variety of gifts, and I guess you could say that we made sure that we covered all the bases.  The only criteria was that the gifts were easy to pull together, and inexpensive.  Perfect.

Let me just show you our set up that we had.  It is just a cell phone pic that I snapped really quickly before the class started, but it gives you the basic idea of how many things we covered.


Over the next week, I will be sharing all of our ideas, tips, and tutorials that we shared during our class. I think that there will be something for everyone and you won't want to miss out.  I have a couple of posts scheduled every day, so be sure to check back often so you don't miss anything.  I will also be using this page as a place to post a link for all of the gifts.  At the end of the week, you can refer back to this post to be able to get to all of the tutorials.
My sister, Charli, was the sister that helped teach the class, and she will be helping me to share all of the fun gifts.  I tried to talk my mom into helping me write the tutorials for the things that she did, but she politely declined.  Maybe someday I will get her to guest post here for me.  You would love her because she is delightful, talented, and so creative! 
I hope you enjoy this week!  Plus I have some other non gift related posts coming up this week as well.  Phew!  So many posts and so little time.  

Links to Gift Ideas:


Pin It!