Showing posts with label furniture. Show all posts

Monday, November 19, 2012

DIY Beanbags

Let's see....where did we last leave off?  I had just shown you my loft space and now I need to show you what happens to be my favorite part of the loft.

Simple DIY bean bags

These bean bags aren't just your run-of-the-mill bean bags.  No sir-ee!  I originally had a 6 foot love sac in the loft.  The kids loved to play on it (sometimes) and it was ALWAYS flat and not pretty at all.  It was a pain in the behind to fluff up and it was WAY too heavy to think about moving around.  So, there it sat.  Flat and in the corner for two and half years.

I had an ah-ha moment one day.  I thought, "what if I were to turn this love sac into something that is cute and functional that the girls could use more easily?"  And that is when I decided I would make my own bean bags!

Simple DIY bean bag tutorial

The pattern I used for the bean bags is from Michael Miller fabrics and is perfect.  I wanted these to be colorful, full of patterns, and so fun.  I think I achieved that look for sure!  I used fabrics that are thick and durable because I don't want to have to redo any of it later on.

simple DIY bean bag tutorial

The verdict is in, and the girls love them!  They are always sitting, jumping, and playing on them.  I would say that is was worth the time spent on them.

I do have a couple of warnings for you.
#1 The first one will take you a long time.  Just plan on it and know that once you get the hang of it that the next ones won't take you as long.
#2 The stuffing will make a big mess.  Also, if you have a 6 foot love sac, three bean bags won't use all of the stuffing.  You will have enough to make like 7 or 8 probably.

simple diy bean bag tutorial

That being said, you should make them because they are adorable.


Pin It!

Wednesday, November 14, 2012

The Loft

There are several rooms in my house that I need to show you at some point.  Today I am going to show you one of my favorite areas that up until this last week was pretty much unused/ unusable.  You may remember our DIY built in bookshelves that I posted about not too long ago.  The bookshelf is located in "The Loft" which you will find at the top of the stairs. Let me give you a tour of the area that I worked on while my husband was out of town last week.


If you will imagine with me, this room used to be all dingy white colored.  There was no beadboard or trim, and there really was no life to the loft.  All that was in it was a large love sac, a play kitchen and the bookshelf that was recently added.  It was a nice space, but we couldn't really relax and it didn't really have a purpose.  Now it does!  This loft is now a place my family can sit and enjoy together.  We can read and play in this area and it doesn't require sitting on the floor!


As you can see, I finished the bookshelf and added our books and some other decor items that I thought would look nice.  I am still finessing the way it all looks, but I am pleased with the way it is going so far.


The whole thing started with the bean bags and chairs.  I will tell you more about the bean bags in another post, but will tell you about the chairs now.  I scored these awesome chairs at the local thrift store (DI) for $40 for the set!  Seriously.  They are pristine!  There isn't a scratch or a stain on either one of them.  I was originally thinking I would recover them, but once I got them into the loft, I kind of fell in love with the way they looked with everything.  I may change my mind later on, but for now, I will keep them this way (minus one idea I have that I may or may not try.)


In the name of keeping things "real" around here, this is what the rest of the loft looks like currently.  I have HUGE plans for this space including a large L shaped desk and cabinets so that we can keep our computer out in the loft.  When I was adding the bead board and trim this last week, I made an executive decision not to do anything to the desk area until I knew the measurements of the desk so that I wasn't wasting any time doing things that would be covered up anyway.  That is why the paint and the baseboards stop suddenly.

Well, there you have it.  The project that I worked on while John was out hunting.  I will be showing you some of the details and the how-to's (sort of) the rest of the week.  Let me know if you have any questions about anything!


Pin It!

Monday, August 22, 2011

A Cabinet Refinished

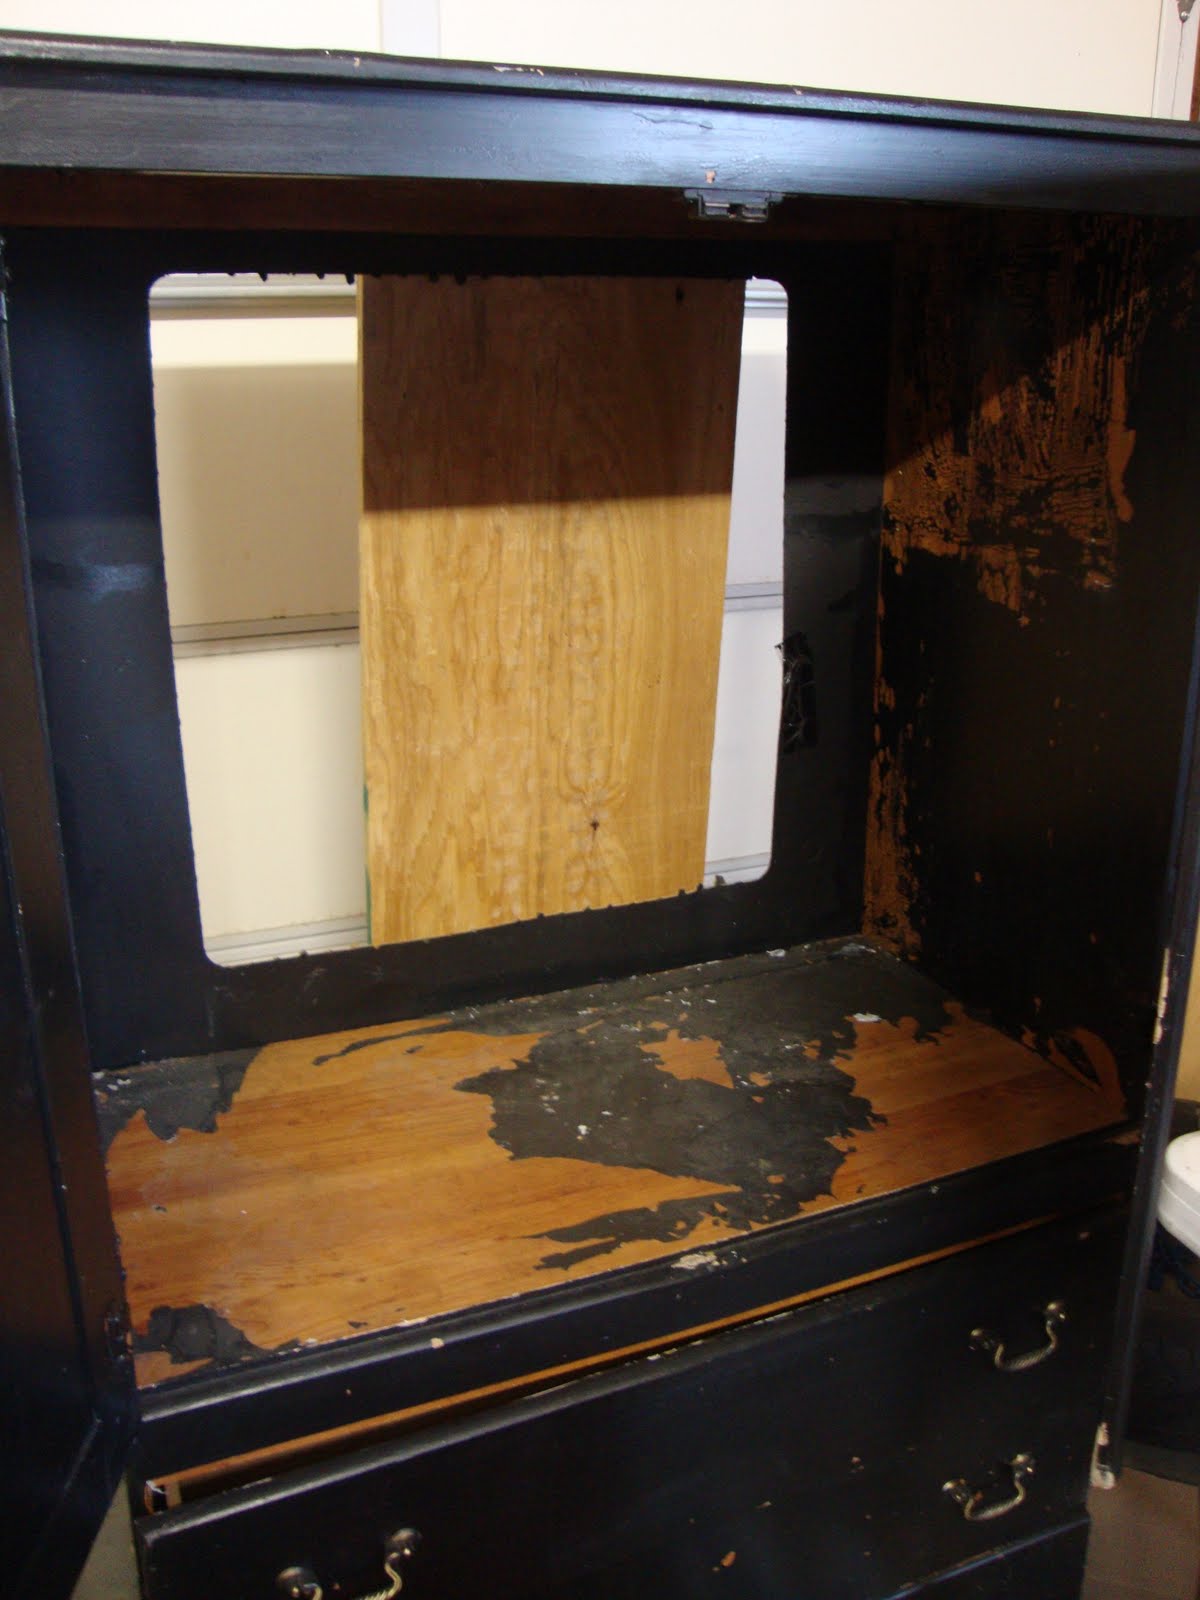
This project has been one that I have been meaning to finish for a long time.  Like since Feb.  My parents have been so patient to let me leave this old cabinet I got from the thrift store (for $10) in their garage.  I figured it was about time that I just got to work on it.  I knew it would end up being a TON of work which is probably why I didn't start it sooner, but I am so glad that I finally just did it.  Here is the before.


The drawers were falling apart, the hardware was bent out of shape, and there was a big hole in the back of the cabinet.

The cabinet is laminate and the previous owners didn't know how to paint on a laminate surface.  I know because the paint came off in strips and didn't stick to the surface at all.  I did a lot of research on how to paint a laminate surface properly and now it looks a ton better and won't just peel off.

I started by removing all the paint.


Then I sanded the shiny part of the laminate off with an electric sander.  This makes it so that the paint will adhere to the surface.  If you attempt this, just make sure you don't go all the say through to the particle board.  It doesn't hold the paint the same way that the laminate surface does. This is where the photos of the actual process stop.  I just wanted to keep working and didn't take the time to take pictures along the way.
Next, I cut a piece of beadboard to go into the back of the cabinet to cover the hole and added shelving in front of it.

The drawers needed to be repaired so I used wood glue and a staple gun and fixed them up.

The whole thing got coated with primer.  Once it was dry, I lightly sanded it to make it smooth.

The last step was to paint the whole thing and add new hardware.


I am so pleased with the way this turned out.  I have been wanting a place to store all of my piano and flute music in my house (that didn't include a box) and this worked perfectly.  I am so glad that it is finally finished because it took me probably 4 days of working on it to get it finished. (plus the 7 months that it was sitting in a garage)  


Here's the before and after side by side:


Pin It!

Thursday, August 12, 2010

First Post

I thought I would start this blog out with a project that I just recently finished but that I have been working on for quite a while now. 

I took this: (ok, maybe not this exact wood.)


Put it together like this:


Painted it with this color: (you can find it here)


And now it looks like this:


The plans for this project came from Ana author of knockoffwood.com.  If I can do this, you can too!  Her plans are easy to follow and the result is awesome!  You can find the plans for this here. I think in total I spent about $70 for all of the wood, screws, paint and caulk for both the bench and shelf.  So much cheaper then buying it. 

Please feel free to let me know what you think or ask any questions you might have.  I hope you like it!
Pin It!