To show you how I put together my
front room, I thought I would start by showing you my pillows since they were the inspiration for the rest of the room.
I was searching through some clearance items at Target when I stumbled upon some fun placemats and napkins. For less than $1.00, I knew I should get them for something.
And then I found this:
It was love at first sight! I decided right then and there that I needed to use it in my front room as pillows.
The best part was that all of the placemats and napkins I had just picked up were Orange and Yellow as well! I was destined to have this! My mom pointed out that in one of the placemats there was a great shade of turquoise in it. And thus my color palate was born.
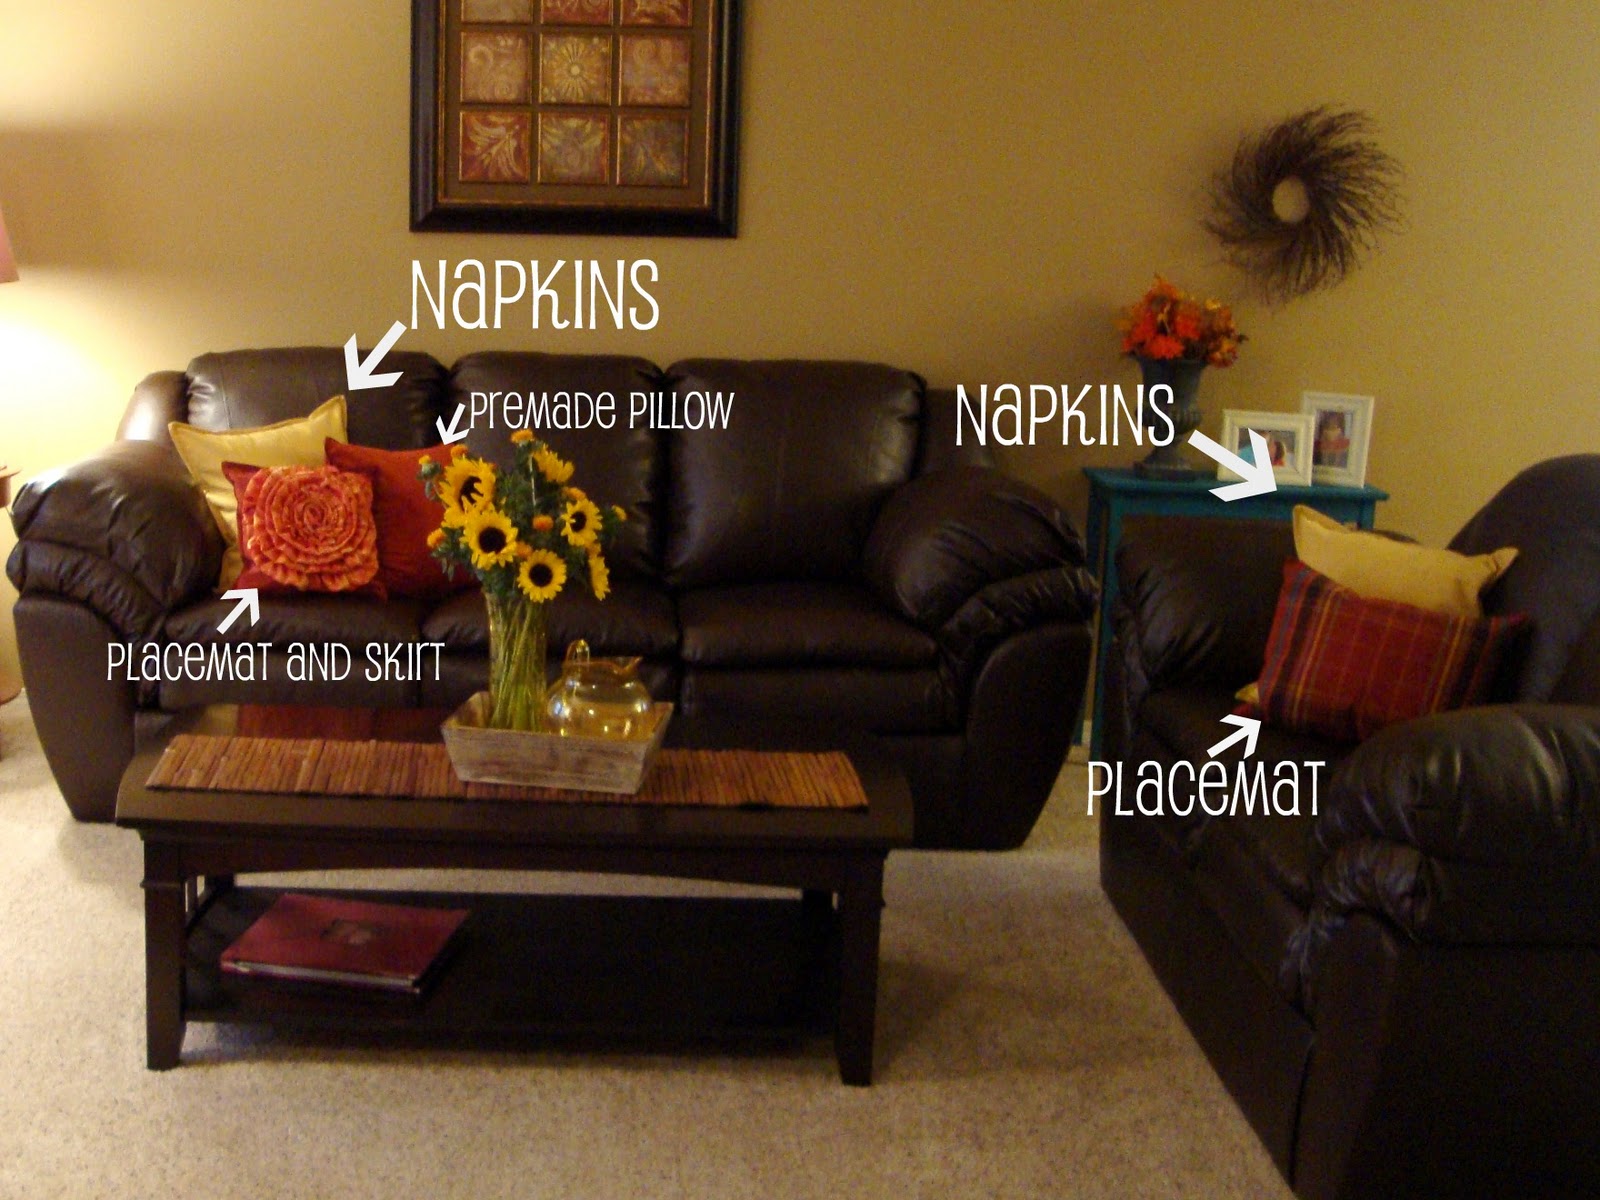
Here is the run down of the pillows:
This is where I ended up using part of the runner. The other part is on the entry table.
The yellow pillows were napkins. All you need to do is sew two of them together and then stuff it. I didn't want to have to buy pillow forms, so I just used old pillows that I didn't use anymore and fit them to the napkins. They worked like a charm. If it didn't have enough "stuff" in it, I just filled the rest of it with some cluster stuffing that I had on hand.
The plaid placemat pillow is the one that had the blue in it. All you do is unpick a small section of the placemat, stuff it and then hand stitch it closed.
The premade pillow was a HUGE score! It was only $3.79 and it matched perfectly. Yes! One less pillow to make.
Last but not least, the flower pillow. This one has more of a story behind it.
This is a picture of me, my sisters and my husband on my wedding day four years ago. My aunt Teresa was so kind as to make these beautiful skirts and dresses for my sisters. The only problem is that my sisters have grown up and the two youngest don't fit in their dresses anymore, and Charli (on the right) and Jessie (on the left) don't use them anymore.
I told my mom about my idea to make a rosette pillow and she suggested that I use the fabric from Jessie's skirt to make it. (remember, she is the one on the top left.) I toyed with the idea for quite a while and then finally took the plunge because the colors were perfect for my living room. One of the placemats I found was just the right color to be the background. I cut the placemat down so that it was a square. Then I cut the skirt up into strips, made them into ruffles and simply pinned and then sewed from the outside in, one layer at a time. It took forever, but the result is worth it! I now have a beautiful pillow that reminds me of one of the very best days of my life.
I just hope Jessie doesn't mind :) She is currently serving as a
missionary for
our church in Mesa, Arizona and doesn't know about the pillow yet.
(As a side note, if you are in the Mesa area and are wanting to see the beautiful
Mesa LDS Temple, do it! And if you happen to run into a Sister Rosdahl, tell her that Jonie says hi.)
And there you have it. The start of a great living room! I think out of all of the different things that I did in the front room, these made the most impact of all. It definitely warms up a room to have some pillows.