Showing posts with label repurpose. Show all posts

Monday, November 19, 2012

DIY Beanbags

Let's see....where did we last leave off?  I had just shown you my loft space and now I need to show you what happens to be my favorite part of the loft.

Simple DIY bean bags

These bean bags aren't just your run-of-the-mill bean bags.  No sir-ee!  I originally had a 6 foot love sac in the loft.  The kids loved to play on it (sometimes) and it was ALWAYS flat and not pretty at all.  It was a pain in the behind to fluff up and it was WAY too heavy to think about moving around.  So, there it sat.  Flat and in the corner for two and half years.

I had an ah-ha moment one day.  I thought, "what if I were to turn this love sac into something that is cute and functional that the girls could use more easily?"  And that is when I decided I would make my own bean bags!

Simple DIY bean bag tutorial

The pattern I used for the bean bags is from Michael Miller fabrics and is perfect.  I wanted these to be colorful, full of patterns, and so fun.  I think I achieved that look for sure!  I used fabrics that are thick and durable because I don't want to have to redo any of it later on.

simple DIY bean bag tutorial

The verdict is in, and the girls love them!  They are always sitting, jumping, and playing on them.  I would say that is was worth the time spent on them.

I do have a couple of warnings for you.
#1 The first one will take you a long time.  Just plan on it and know that once you get the hang of it that the next ones won't take you as long.
#2 The stuffing will make a big mess.  Also, if you have a 6 foot love sac, three bean bags won't use all of the stuffing.  You will have enough to make like 7 or 8 probably.

simple diy bean bag tutorial

That being said, you should make them because they are adorable.


Pin It!

Wednesday, November 14, 2012

The Loft

There are several rooms in my house that I need to show you at some point.  Today I am going to show you one of my favorite areas that up until this last week was pretty much unused/ unusable.  You may remember our DIY built in bookshelves that I posted about not too long ago.  The bookshelf is located in "The Loft" which you will find at the top of the stairs. Let me give you a tour of the area that I worked on while my husband was out of town last week.


If you will imagine with me, this room used to be all dingy white colored.  There was no beadboard or trim, and there really was no life to the loft.  All that was in it was a large love sac, a play kitchen and the bookshelf that was recently added.  It was a nice space, but we couldn't really relax and it didn't really have a purpose.  Now it does!  This loft is now a place my family can sit and enjoy together.  We can read and play in this area and it doesn't require sitting on the floor!


As you can see, I finished the bookshelf and added our books and some other decor items that I thought would look nice.  I am still finessing the way it all looks, but I am pleased with the way it is going so far.


The whole thing started with the bean bags and chairs.  I will tell you more about the bean bags in another post, but will tell you about the chairs now.  I scored these awesome chairs at the local thrift store (DI) for $40 for the set!  Seriously.  They are pristine!  There isn't a scratch or a stain on either one of them.  I was originally thinking I would recover them, but once I got them into the loft, I kind of fell in love with the way they looked with everything.  I may change my mind later on, but for now, I will keep them this way (minus one idea I have that I may or may not try.)


In the name of keeping things "real" around here, this is what the rest of the loft looks like currently.  I have HUGE plans for this space including a large L shaped desk and cabinets so that we can keep our computer out in the loft.  When I was adding the bead board and trim this last week, I made an executive decision not to do anything to the desk area until I knew the measurements of the desk so that I wasn't wasting any time doing things that would be covered up anyway.  That is why the paint and the baseboards stop suddenly.

Well, there you have it.  The project that I worked on while John was out hunting.  I will be showing you some of the details and the how-to's (sort of) the rest of the week.  Let me know if you have any questions about anything!


Pin It!

Friday, June 24, 2011

POV {Shelves}

My shelf was really simple, but fun.  I went to the local thrift store and stumbled upon this beauty.


I knew that it had some potential and started thinking about where I wanted to use it and how.  I then decided that my front porch was going to be the perfect place to put it. 

First, I had to fix a couple of cracks in the wood with some wood filler.  I also tightened the screws.  Then I used Rustoleum's Warm Yellow spray paint to freshen it up and add some fun color to my front porch. 


I knew that I wanted to have some sort of flowers on it.  There is something about having flowers on your porch that is so inviting I decided.  So, I got to work with my little helper.  Using some plastic pots that I had saved from years before and forgotten about, I planted some fun bright flowers.


 The end result just makes me smile.  I feel like my porch is so much more inviting. 


I can't wait until I get my whole porch finished.  I have been trying to make my mind up about a couple of things and I think I have finally figured it out.  As soon as I finish it I will show you.  Promise.

Don't forget to link up your shelf projects.  You can find the linky right here on my blog.  It will be open through the weekend!
Pin It!

Saturday, February 19, 2011

Toddler Bed Tutorial

I finally can sit and breathe long enough to get this written up. 


This is for anyone that is wanting to make one of these for their little toddler, or needs a comfy place to sit and snuggle with your baby.

(I will not be giving specific measurements as every bed will be different based on the headboard and footboard that is used.)

To begin, you will need an old queen sized headboard and footboard.  Cut the footboard in half.  The two halves become the sides of the bed.

To get my sides to be the right height, I used blocks of wood under the front legs of the sides.  I will point it out to you in a min.

Attach the sides to the headboard using "L" brackets. 


Then you will need a 1X2 that is the length of your headboard.  Screw it directly into the headboard.  This will be where the boards go to hold your mattress. (it is the lighter wood that is horizontal on the headboard.)

I also added molding to the front of the bed legs.  It helped to make it look more pulled together.  All you need is a little liquid nails and some painters tape.  Let the glue dry and you will be good to go.  It is not an area that will be holding any weight, so glue works perfectly.
Now, sand it like crazy.

You will need some 1X6s for the next part.  Measure the distance between the two legs and cut your 1X6 to that size.  It is going to be the front of the bed.  I used "L" brackets to attach it as well.  Then, just like you did with the headboard, attach a 1X2 directly into the 1X6.  It will be the front part of where the mattress boards will rest.  Measure the distance from the front 1X2 to the back 1X2 and that will tell you how long to make the boards to support your mattress.  I used 1X6s and 6 seemed to be just the right number to give the needed support.


This is where pictures become a little scarce, but I will try to do my best to describe the next steps. 

I wanted to have a shelf underneath the bed to hold toys and whatever else my daughter wants to put there.  I got 1/2 inch plywood and had it cut to the size of under the bed.  You can't see it, but the plywood rests on the blocks of wood in the front.  In the back, I got a 1X4 and connected it to the headboard along the floor.  Then I screwed through the plywood into the 1X4 to give it support.

Next, I wanted the front to be a little more supported, so I got a square piece of wood and attached it to the front, middle part of the bed. 

I ran a little molding across the front to cover the ugly plywood and then put on a coat of paint.

Here is my advice to you.  Measure your doorway in relationship to your bed.  Will the bed fit through your doorway once it is assembled?  If the answer is no, you will need to make it so that you can un-assemble and then re-assemble if needed.  Otherwise, you will be just as discouraged as I was.  I had a couple of hours to go before my post had to be submitted to the contest when I tried to bring the bed into my daughter's room.  I cut it really close to the deadline that day. At least I made it and I didn't even swear once.  (outloud) 

I am so pleased with the way it all turned out.


This happened quite by accident, but trying to get the bed in the room caused some of the paint to rub off/chip off.  So I decided that instead of re-painting, the bed would become a shabby sheek bed and I am glad I did.  It really added a lot to the bed and I love the result.  I sanded a couple of other parts to make it all look like it worked.


I hope that my tutorial all made sense for you.  Please let me know if there are any questions that you have.  Also, if you decide to make one of your own, I would LOVE to see it.  Send me a link!

If you haven't seen it already, there is now a facebook page for Just Between Friends!  Go ahead and click like.  you can find it on the sidebar of my blog.  There is no pressure to like it, I just thought it would be a fun way to get to know my readers better. 
Pin It!

Monday, February 7, 2011

Decoupaged Backsplash Tutorial

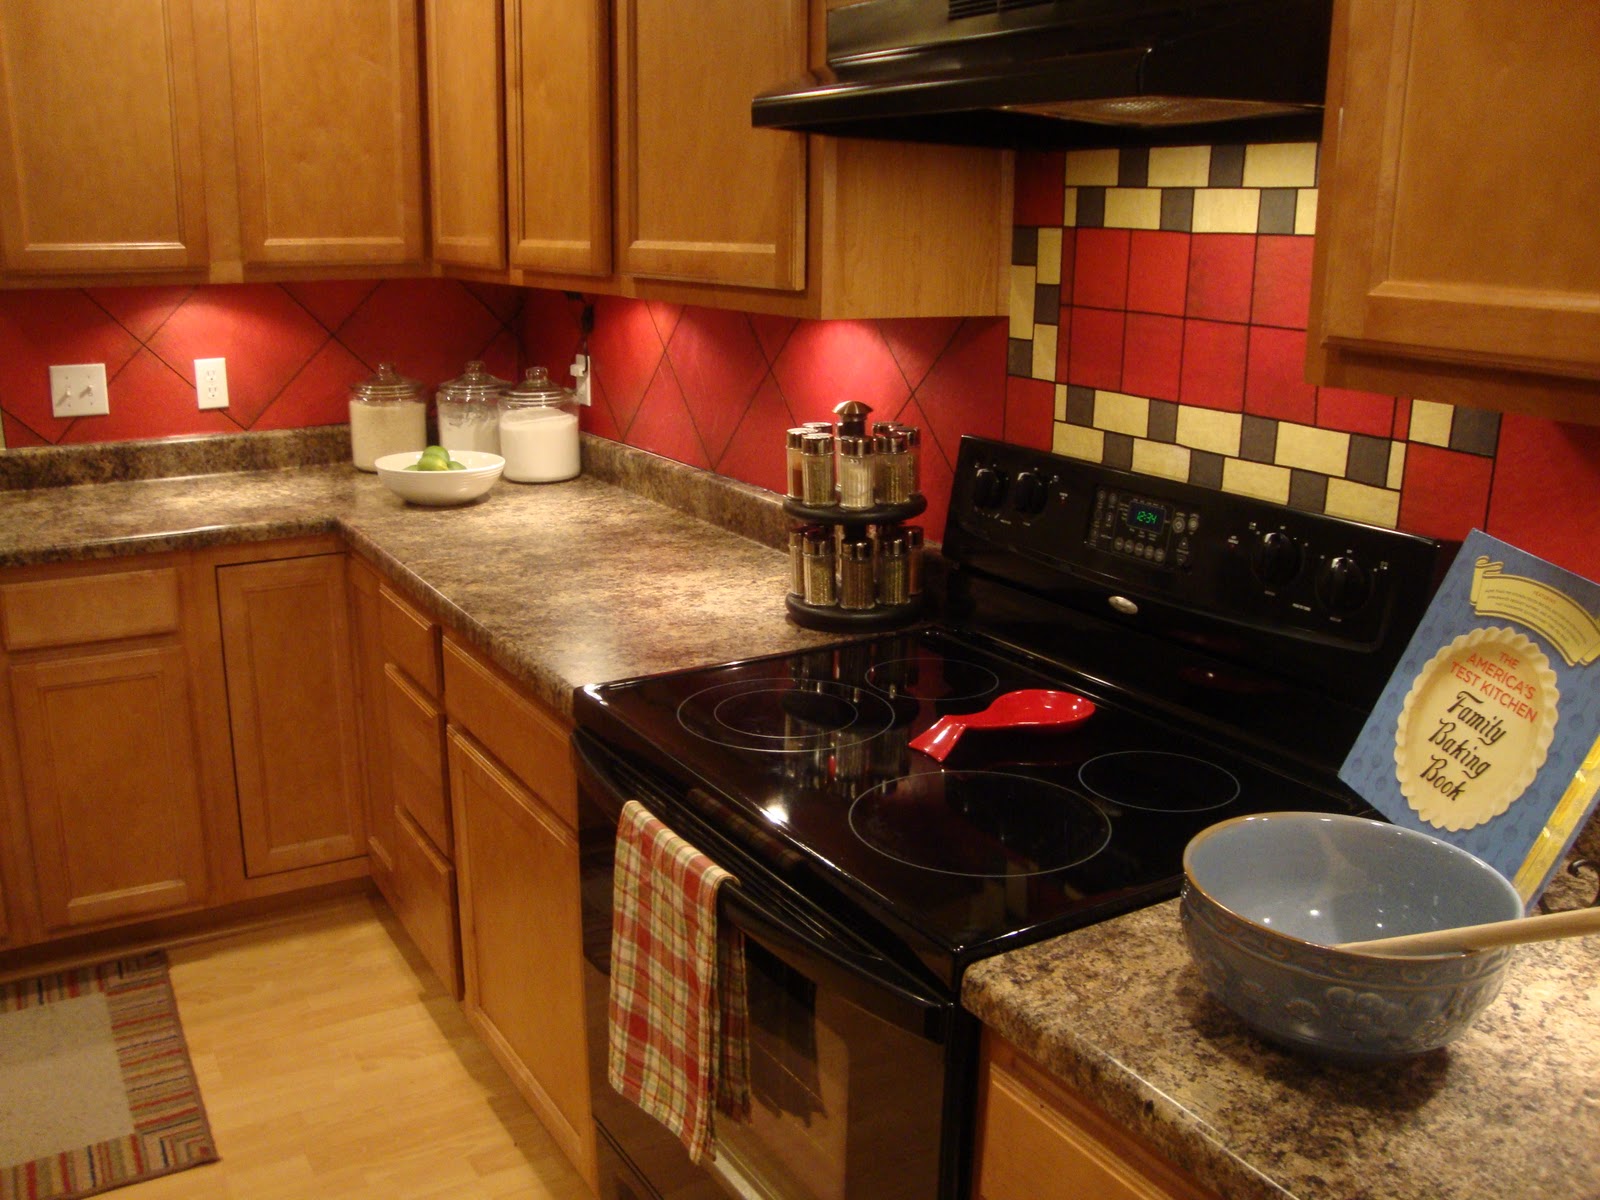
Wow!  What a response!  I am so glad that you all liked my backsplash and am so excited to show you how to do it to your own kitchen.  I would have written up this tutorial sooner, but I have been working hard on my project for the third round of Crafting with the Stars and literally haven't had a moment to myself.

Let's get started.  These are the supplies you will need.

-scrapbook paper 
-art tape (you can find this at your local office supply store.  It is a thin black tape that I used for the grout lines.)  Make sure to get the 1/8 inch size
-mod podge (matte finish)
-scissors/rotary cutter
-sponge brush

To start out, I looked online for backsplash patterns that I liked as well as colors that i thought would be good together in my kitchen.  I then sketched it out so that I knew what I wanted.  I also measured out how big the spot above my stove was so that I could draw out the exact pattern I wanted and the tiles that I would need to have to complete it.

Next, I cut out all of the tiles.  Behind the stove, the cream tiles were 2X4 inches, the gray tiles were 2X2 inches and the red tiles were 4X4 inches.  The tiles above the counter were just the standard 12X12 scrapbook paper size. 

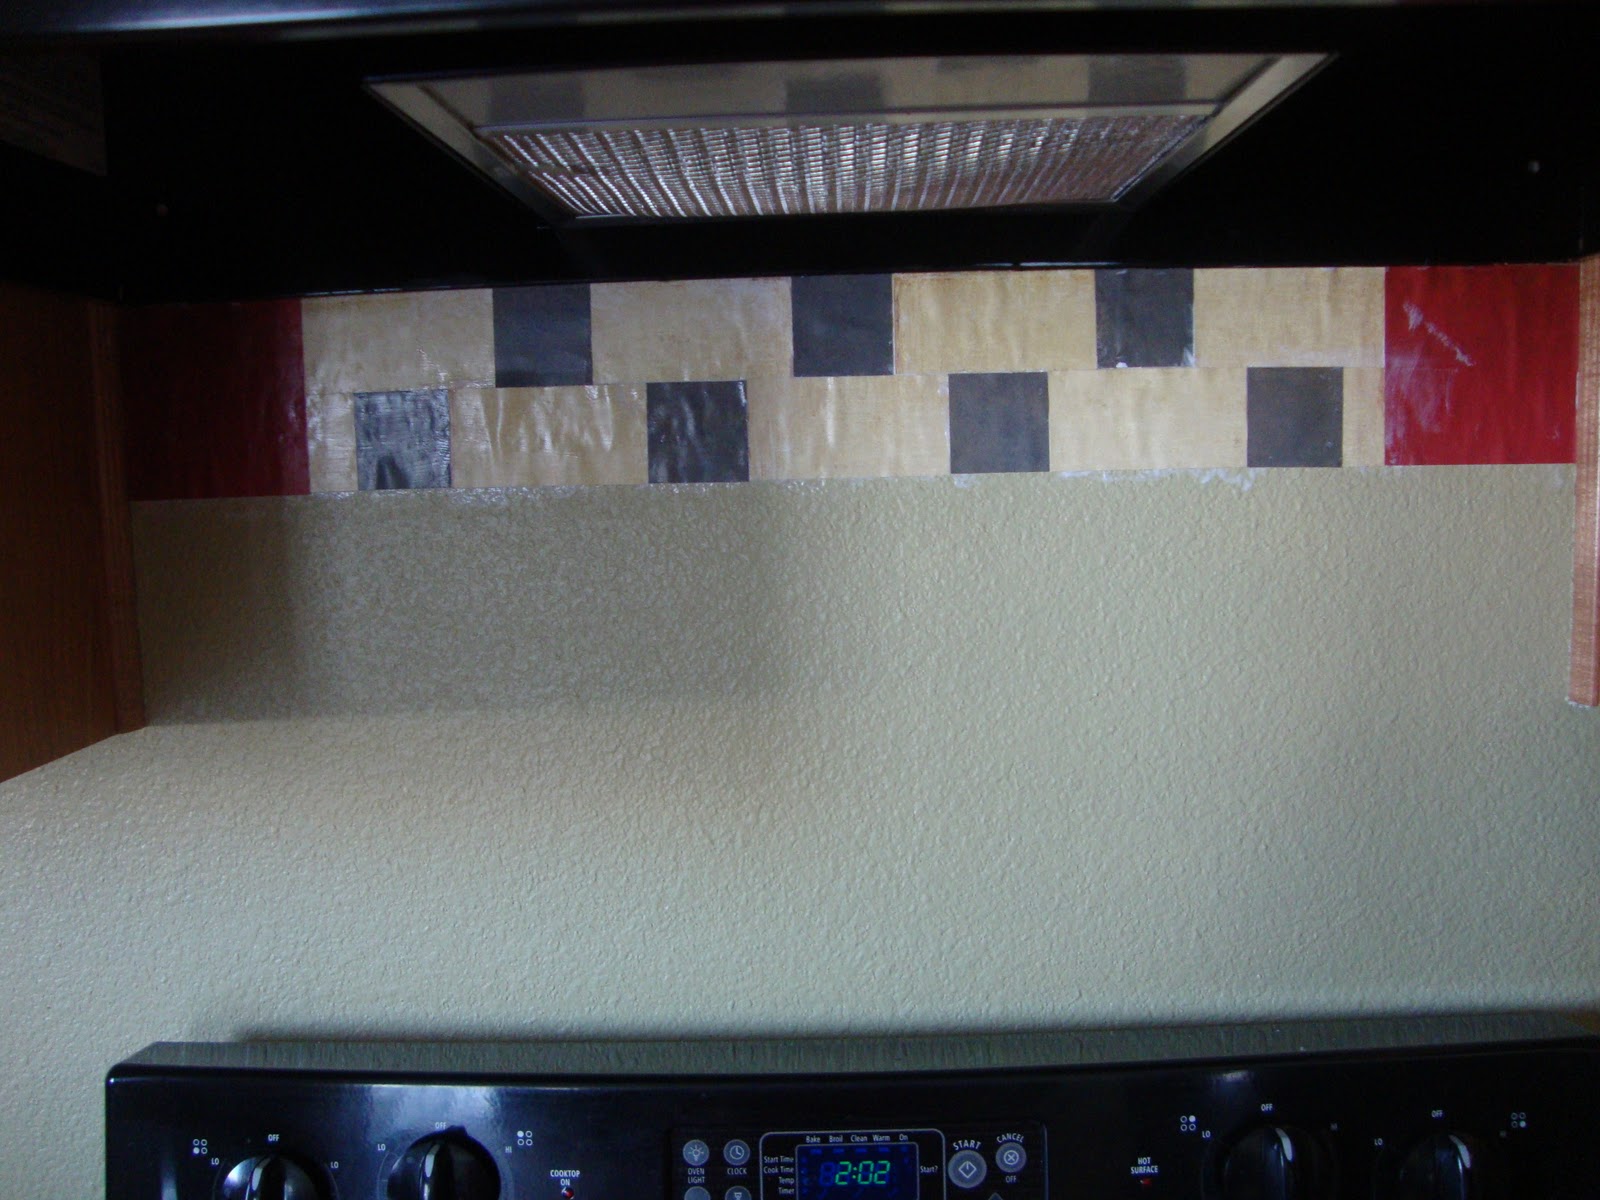
Here is the before:

Just a plain old painted wall.  Nothing special and pretty boring.


The next step is to cut out your tiles and arrange them the way you want them. 

This made it really easy for the application process.  I just went in rows starting at the top and worked my way to the bottom.  I found the best way to attach was to put mod podge both on the wall and the paper.  It made it so that every part of the paper was sealed to the wall.

After the part above the stove was finished, I did above the counter tops.  To get the tiles to be perfectly diagonal, simply cut one paper in half diagonally and attach to the wall.  Once the bottom tiles are in place, the second row should fall into place perfectly. 

My tiles were a little too big to fit exactly, so I had to cut the top off of them.  The easiest way to get it just the right size is to fold it over and then cut along the crease that you made.

Once all of your tiles are in place, put the art tape along all of the edges to make it look like the grout between tiles. 

Add a layer of mod podge over the top to help completely seal the tape and paper.  Let it dry and later go back and use a varnish of some sort.  (I'll let you know when I do it to mine which kind I used)

Now, take a step back and enjoy!

It is an inexpensive and stylish way to add a backsplash.  I also added lights under my cabinets.  I didn't realize how big of a difference having light on my counter makes.  I love the way it turned out. 

Good luck!  Let me know if you have any other questions.  I would be more than happy to help in any way that I can.

If you decide to do this in your own home, I would love to see it!!  Send pictures to:

Don't forget to enter the Lizard King giveaway!  It closes tomorrow at 8 pm.
Also, don't forget to go vote for your favorite project!

Pin It!

Wednesday, January 19, 2011

Hat Tutorial

Here it is, what you've all been waiting for.  (ok, not all of you. But some of you.)  This is how I made the hat for my sister.

*Disclaimer.  I fly by the seat of my pants a lot while crafting, so I don't have exact measurements, but I will show you how to find your own measurements the best that I can.*

All you need is:
An old skirt
sewing machine
seam ripper
pins

Pretty easy so far, right?

When I saw this skirt in Charli's throw away pile, I immediately saw the awesome fabric and then I noticed the waistband.  The waistband on her skirt is about 3 1/2 inches wide making it perfect to make a hat with.

I began by having my sister measure her head.  Then I unpicked the waistband on the skirt and then cut it to be the same as the measurement of her head plus a little extra for seam allowance.

The nice thing about using the waistband is that a lot of the work is already done for you.  To make it a stable hat, it needs to have at least two layers of fabric.  The waistband in this skirt had it already put together for me.  So, all I needed was to add a top a brim and embellish.

The next step is to cut out the top circle/oval part.  It should be a long circle, but not quite an oval.  I think I cut out two or three different sized circles from the lining of the skirt before I had it just right.  (I would suggest using a hat that you already have as a pattern to look off of for the top.  If you have a hat that fits you really well, add 1/4 of an inch all the way around for seam allowance when you trace it onto your fabric, and it should work great as a pattern.  After you cut the circle out of the lining, you will need to cut one out of the top layer of the skirt as well.  (It is easier to replace a lining fabric if you mess up)  Put the pieces together and pin it so that it looks like this.


Sew it up and turn it right side out.  It should then look like this.


From this point on, things get a little sketchy.  Making the actual hat part was no problem for me.  The brim was another matter entirely.  I stopped taking pictures at this point because of frustration.  I made three different brims on this hat but never felt like they fit just right.  Here is how I finally figured it out.  (In words, no pictures sorry)

I put the hat on and decided where I would want the brim to begin and end.  Then I traced an arc onto the skirt fabric using the hat as a guide for where it should go.  I cut out two arcs and then sewed them right sides together only around the arc part.  After that, flip it right sides out and top stitch the brim in two strips. (See picture below:

Then to attatch the brim to the hat, put the right side of the brim against the wrong side of the hat and top stitch. 

The waistband had two buttons and button holes which I thought would add a lot of character to the hat so when I cut out the hat I cut it so that the button holes were part of the hat and then sewed the buttons on top of the button holes.  I also used a little lace from the bottom of the skirt to finish it off.

I really like the way it looks, and the good news is.....It fits Charli's head!  YAY!  Here she is wearing it. 


Charli told me that she really loves it and that is good enough for me! 

Now it's your turn.  Go find that skirt that doesn't fit anymore and make it into something that you will wear and love!  I would love to see what you come up with if you do make one.  You can send me a link to show me at joniemarie85@gmail.com, or you can just leave a comment with a link to your post.

Good luck and please feel free to ask me any questions if anything was unclear.
Pin It!

Sunday, September 5, 2010

Bandana Dress Tutorial

A couple of months ago, I made this dress using a bandana John's aunt gave to Lillie and I.
I had a lot of people request a tutorial on how I made it.  To be honest, I wasn't too excited to make another one because I only really need one cowgirl dress for Lillie.  Then it happened.  I was at walmart one day and found these beauties.

I knew they needed to be mine and that I would indeed be able to post a tutorial.  I LOVE Halloween!

This is how I made the dress:

1. Buy 2 bandanas
2.  Cut the bandana using the middle of the material for the body of the dress.  (It makes the dress look better if the main pattern is all showing and not cut off.)  The sides will be used as ruffles so make sure they are the same size.  I left a 15" piece in the middle to fit Lillie. Cut big piece in half.


3. Put wrong sides together and then fold in half so all four edges are touching.  Cut arm holes.

4. Using the sides, make a ruffle using a running stitch along one edge.

5. (optional)  Using Tulle, make another ruffle.

6.  Pin ruffle on bottom of dress with right sides together

7. Zig Zag edge

8. Turn right sides out.  It should look like this.

9. Use elastic or elastic thread to add a smocked look.  To simplify, just sew two pieces of elastic to dress like I did in the first dress.

10. Use 2nd bandana to create the straps.


11. Sew right sides together

12.Turn right side out sew down both sides

13.  Cut 6" per strap

14. Zig Zag around top of dress

15. Fold over and sew along edge

16.  Attach straps to top
17. Sew a box to secure straps
18.  Dress is done!  You can stop here and have a great dress, or you can add some embelishments to make it even cuter.

I love the way it turned out.  I think Lillie likes it too!  (sorry about the blurry pictures.  I couldn't get her to stop running around)


Please let me know if you have any questions about this or if anything was unclear in the tutorial. 
Pin It!