Showing posts with label craft room. Show all posts

Friday, October 26, 2012

My Craft Room {2}

I think it is a necessity for every woman to have a place that she can call her own.  Some may claim the kitchen table, some are in a closet.  I am fortunate to have an entire room that I call my very own.  Welcome to my craft room.


This is something that I have been working on for a VERY long time.  I am talking two and a half years.  This isn't something that just happened overnight.  Bit by bit and piece by piece I have made this a place that I love to use to create and inspire.


I think the most common misconception about decorating is that it has to be expensive.  It doesn't have to be.  Let me show you where I saved my money.


I found all of these things at my local thrift store (the DI) and for very affordable prices as you can see.  The table was my splurge, but at $40, I felt that it was a great find.  The table is counter height and is about 4 1/2 feet square.  It is my main creating surface.  I already told you about my bookcase, but in case you need a refresher, you can click over and take a look at it again.  The chair, I love it.  I do a lot of up and down while doing projects, and it is nice to have something that is pretty much the perfect height for me to lean on or sit on whichever I decide to do.  The vintage patterns were something that I knew I wanted, but didn't have any idea where I would get them.  One day while I was at the thrift store, I happened to see a very large pile of them.  I went through and chose my favorites, and at .25 a piece, I knew I couldn't lose.  I really love the way they look displayed on my peg board.


Do you want to see where I started?  This is what the room looked like when the previous owners lived here.  (Yes, I was the crazy lady that went through and took pictures of every single room when we were walking through because I wanted to show everyone the house we were looking at.)  I am only showing you Craft Area "a" and will save the other half of the room for another day.


Big difference, huh.  Just you wait until you see the rest of the room. :)  Just so that you can assimilate yourself, the door would be to the right of this photo.  The table is the first thing that you see when you walk into the room.


 There are a ton of little details that I love, but let's start with my jars from IKEA.  I love the way my loose ribbons look folded up inside of the jars.  It is a great way to keep them organized and still be able to see what I have.


I also love the way I have my scissors and tools hung up.  I bought the holder at Home Depot when I bought the peg board (which I spray painted yellow and am SO glad because I love the cheery color and the way it brightens the room.)


I have a love of bakers twine.  I bought mine from Pick Your Plum when they had it as the deal for the day.  If they ever have it for sale, buy it from them because it really is the best value for your money.  The pink basket is one that I got from Target in the dollar section a while ago.  It holds all of my washi tape (I told you I love it.) and some assorted pretty spools of thread.


One of my very favorite things EVER is my shelf.  I found this awesomeness at Robert's Craft when they were going out of business.  I snatched up 5 of them.  No really.  Do you want to see what my sister did with one of them?  You really should go look at her nursery that my mom did for her.  You can find it over on my mom's blog (that she doesn't actually write....we (my sister's and I) just thought that everyone should be able to see the awesome projects that my mom does.)  Anyway, when I got it, it was a really gross green color.  I painted it this awesome sea foam color and put some vinyl on it.  In the end, I really really really love it.


So? What do you think?  Would you like to come craft with me?  I am always looking for people to do projects with me :)

If you have any questions about anything, let me know.  I am happy to answer them for you!
Pin It!

Thursday, May 10, 2012

My Craft Room {1}

I have been working on my craft room off and on for a couple of months now.  It is kind of the project that I get to when I feel like it and I'm not in a huge rush to get it done.  I finally feel like it is pretty close to where I want it to be, so I thought I would show it to you a little at a time.  That way you can see what I have done in some places, but I can finish up the rest of the room too.


When you first walk into my craft room, you will see this bookshelf directly on the opposite wall from the door.  I found it at the local thrift store and immediately knew I needed it.  For only $8, it had to be mine!


It began a dark brown wood color, but I sanded it and painted it to lighten it up.  The color is Sea Glass by Martha Stewart.  You can't buy her paint anymore, but you can try to color match it. 


After I painted it, I wanted a little of the brown to show through, so I sanded the edges to give it a little bit of a shabby look. 


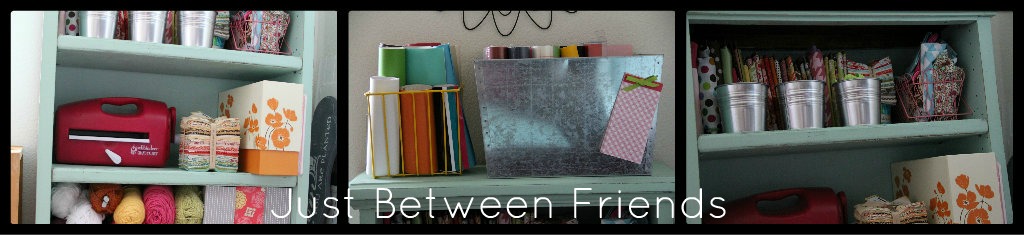
It is the perfect addition to my craft room.  It houses my pretty fabric (aka the cute stuff) as well as my yarn, ric rac, and spellbinder.  All of my ric rac is stored in the metal buckets that I got from IKEA.


On the top of the bookshelf you will find all of my vinyl.  I got the yellow basket from the thrift store (DI) and the metal container I bought at a craft store that was going out of business.  So glad I found it!  I am loving the way my space is coming together.  All of the colors make me so happy and inspire me to do more creative things.


I hung this flower over the top of the bookshelf and love it.  It is feminine and fun.  I bought it at Hobby Lobby in the outdoors section. 
(If you look closely, you will see a little sneak peak of some other fun things in my crafft room. :)
Pin It!

Saturday, October 16, 2010

Questions Answered about the Ribbon Holder

Sorry about the lack of posts this week.  I just returned from a vacation with my family to Island Park in Idaho.  What a fun time! 

I was pleasantly surprised to come back to find that I had been featured on several blogs, that I had gained 11 new followers, AND that my blog has reached over 10,000 views!!!!  Holy Moly!!!  I am honored, really.

In my inbox, I had several people ask me questions about my ribbon holder and I will try to answer them as best as I can, but if I don't answer them entirely, pa-lease just let me know and I would be happy to help you out.

The most commonly asked question is what I used for the thread pegs, and the second most asked question is how does it all function.  I am now sorry that I didn't take step by step pics, but I will try my best to expain (without having to make another one.)

*To make this, I bought three of these from IKEA, but you could do the same thing with a 1X8 piece of wood (It would probably cost less.)
*Buy some wood dowels.  I purchased mine from Lowe's for a dollar I think.  They come in all sorts of sizes.  I think I ended up buying either 1/4" or 1/2" diameter.  Just look at the diameter of the dowel and think about how big it could be and still go through the thread or ribbon.
*I bought a couple of pieces of lathe for 50 cents a piece.  (I used it to go around the top and bottom of the box to make it look nicer)
*Lastly, I bought a package of bead board from Lowe's.  It has a bunch of pieces of bead board in the package for about $11.00 total. 

First of all, I cut one of the shelves exactly in half.  The two halves will be used as the sides and the other two shelves will be used for the top and bottom.

Second, I cut the one of the dowels into three inch pieces for the thread to go on.  If you space them 2 inches apart like I did, then you will need 14 of these.

Before you assemble the IKEA shelves into a box, drill holes in the bottom shelf that are the same size as the dowels you bought.  IMPORTANT**** the holes should NOT go all the way through.  Just drill half way through the board.  I put the holes towards the front part of the board so that I would still have room to put the ribbon behind the thread.  

Third, make a box out of the four pieces by screwing them together.  (I like to use screws just so that it will stay together a little better.  Just be careful not to split the wood.  If it sounds or feels like it is cracking, back the screw out and try again.  It also helps to make sure that you are pushing down with the drill.)  After the box is made, add the thread dowels by putting a drop of wood glue into the hole and then putting the dowel in.  It should be a tight squeeze.

Fourth, I drilled holes in the sides for the dowels that would hold my ribbon.  Drill competely through the board for this part.  This is how the whole thing works.  This way, the dowel goes all the way through both sides.  When you want to add more ribbon or take one off, just slide it through one side and easy peasy, it works!  When you cut the dowel for the ribbon, add two inches to the length of the shelf so that the dowel will hang out the sides.  You don't want the dowel to slide out on its own.  There is enough room to add three dowels for ribbon.  I only added three because I didn't have more ribbon than that.  It is nice to know that I can buy more and have a place to store it though :)

Fifth, I simply added lathe to the front and sides.  Just cut to size so that the front piece goes in front of the side pieces.  Trust me, it looks better that way.  Then use little finishing nails to add it on.  The wood isn't very heavy, so it will stay on just fine.

Sixth, cut the bead board to size and add to the back.  I could have turned the bead board the other way and not had to cut as much, but I like the way it looked with the lines going up and down.  (This was all done before I had an electric saw.  It was a TON of work!)  I also used nails on this part.

Last, I caulked all of the seams with paintable caulk and then spray painted it.  I used a satin black spray paint.  Make sure to spray paint your dowels the ribbon goes on as well.

There you have it.  A detailed step by step of how it is all done.

I hope this helps answer all of the questions, but like I said before, please let me know if there are other questions.  I love to be able to help! 
 
Pin It!

Thursday, October 7, 2010

Ribbon Holder

POST EDIT:  For a more detailed tutorial, go here.

I originally posted this on my family blog, but thought that I would share it here as well. A while back, I decided that I wanted a way to display my ribbon and sewing threads that was both functional and good lookin.  After much thought, this is what I came up with.

I started with three shelves ($3 a piece from Ikea).  I cut one in half for the sides and then I bought some wood to encase the top and bottom ($1 total for wood).  The big expense was the $11 I spent on bead board and $5 on spray paint, but I still have left over of both. 

This is what it looked like after I had just finished spray painting.
Here it is all finished.  I have room for one more dowel underneath.  I love the colors and the accessibility.  I have a bunch of random ribbons that I didn't know what to do with so I bought these jars from IKEA and put them all in there.  It actually looks really great.

Someday, my craft room will be fully complete and I will show it all to you.  For now, you get this :)
Pin It!