
My daughter is always such a busy body during church. (One more month until nursery) I decided that she needed something that we could bring things to keep her quiet and entertained. Here is the Reverence Bag that I came up with.

Supplies:
2 coordinating fabrics (I bought 1/2 yard of both and have TONS left over.Buttons
Begin by cuttingyour fabric to the size of bag you want. I made mine 12 inches wide by 9 inches tall. (your fabric should be 9X24 inches) Sew right sides together.


Take you other fabric and cut a strip. Mine was 15X3 inches. Fold in half and sew along the sides leaving one part open so that you can turn right side out.

After you turn it right side out. Sew along both sides again to make the top more stable and to give it a finished look. Then sew into a loop.


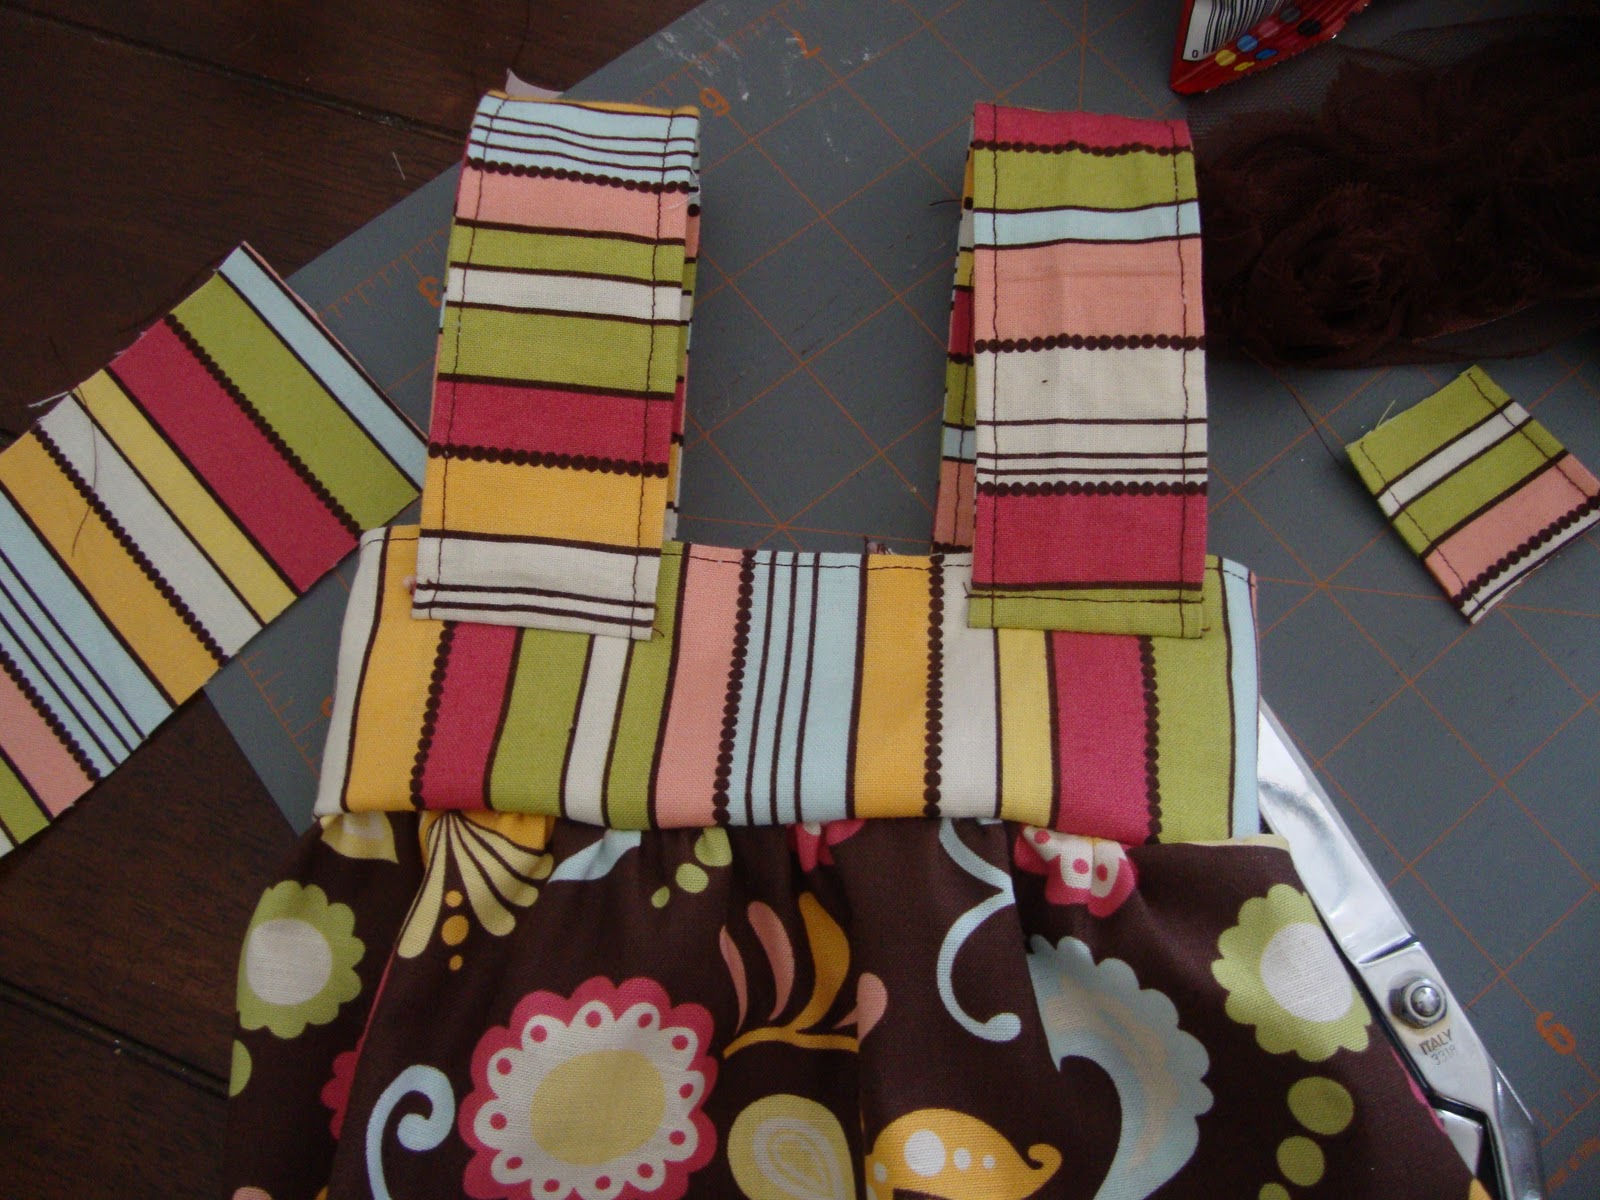
Pin the top into the bag making sure that right sides are together.

It should look like this when it's done.

Sew a basting stitch around the bottom and gather a little. Then just sew together to close. (That's the easiest way to do it.) If you want to do it like I did, I simply cut a strip of the strap fabric and sewed it into the bottom. Both ways work but mine just added a lot more work.
Now to make the straps. You will need a strip of fabric two inches wide and then the length of the fabric. Sew these the same way you did the top of the bag.

To attach to bag, sew the strap on first going the opposite direction that you want it to end up.

Then go back and sew it the right direction. This hides any raw edges and makes it extra secure.

When you get both straps on, it should look like this.
I wanted to add a pocket onto the front of it as well. Using the fabric from the top, I cut a rectangle out and sewed it to the front.

Last all you have to do is add some fun buttons and then you are done!

Now you have a bag ready to take with you to church. (Or wherever you may need to take a bag to keep a little one busy with.)

I filled it with a mini Magna-Doodle, little books, a baby doll, some finger puppets (I'll show you later) and some Winnie the Pooh figurines from the Disney store. Sunday was our first time of trying it out and it seemed to work. She was especially excited about the Magna-Doodle. Go ahead and give it a try

5 comments:
Wow, you are super creative and very crafty! What a great idea; it turned out beautifully!
I hope you're having a good week, new friend. :)
Love the bag! The material is DARLING! Thanks for linking it up to Thrilling Thursday :)
so ummm.. you think you are going to make me one?? cause I really like it! also it could be a tad bigger one for me!! :) XoXoo :)just ponder on it sister k promise me you will! :)
LOVE LOVE LOVE THIS BAG - love the colors...I wish i was a sewer!
I just found you and spent way too long going through your blog! Awesome ideas and I've bookmarked so many already! You've got a new follower and would love if you had a second to check out my blog! Great job!
Post a Comment