Showing posts with label CWTS. Show all posts

Wednesday, February 16, 2011

CWTS, the results are in!

Ladies and....ladies (well...maybe some gentlemen).  The results are in!  After 4 very crazy weeks of competing in this competition, we have a winner.  Sadly, it isn't me, but I still feel really great about how well I did.  I came in SECOND place overall!  There is nothing to be sad about or regret.  I did my best and I love all of my projects.

Thank you for all of your support throughout this competition.  I couldn't have gotten this far without all the votes.  I also want to thank my mom and my star Kierste.  They were such a big help and sounding board for me.  My own personal cheerleaders.  Thank you, THANK YOU!!!  Also, I need to thank my husband for supporting me in my crafting endeavors.  He has been there for me through this whole competition.  Love you!
I will be posting a tutorial for my bean art later on this week.  For now, I am going to go relax and let my life get back to normal.

And because a post is never complete without a photo, here are some more photos of my project.
Pin It!

Monday, February 14, 2011

CWTS FINAL ROUND!

Alrighty friends.  It's that time again (for the LAST time) to go and place your votes.  We are down to the final three and now it is a matter of who gets first, second or third place. 

Head over here to vote and pick mine (if you can guess which one it is)


THANKS!!!
Pin It!

Monday, February 7, 2011

Decoupaged Backsplash Tutorial

Wow!  What a response!  I am so glad that you all liked my backsplash and am so excited to show you how to do it to your own kitchen.  I would have written up this tutorial sooner, but I have been working hard on my project for the third round of Crafting with the Stars and literally haven't had a moment to myself.

Let's get started.  These are the supplies you will need.

-scrapbook paper 
-art tape (you can find this at your local office supply store.  It is a thin black tape that I used for the grout lines.)  Make sure to get the 1/8 inch size
-mod podge (matte finish)
-scissors/rotary cutter
-sponge brush

To start out, I looked online for backsplash patterns that I liked as well as colors that i thought would be good together in my kitchen.  I then sketched it out so that I knew what I wanted.  I also measured out how big the spot above my stove was so that I could draw out the exact pattern I wanted and the tiles that I would need to have to complete it.

Next, I cut out all of the tiles.  Behind the stove, the cream tiles were 2X4 inches, the gray tiles were 2X2 inches and the red tiles were 4X4 inches.  The tiles above the counter were just the standard 12X12 scrapbook paper size. 

Here is the before:

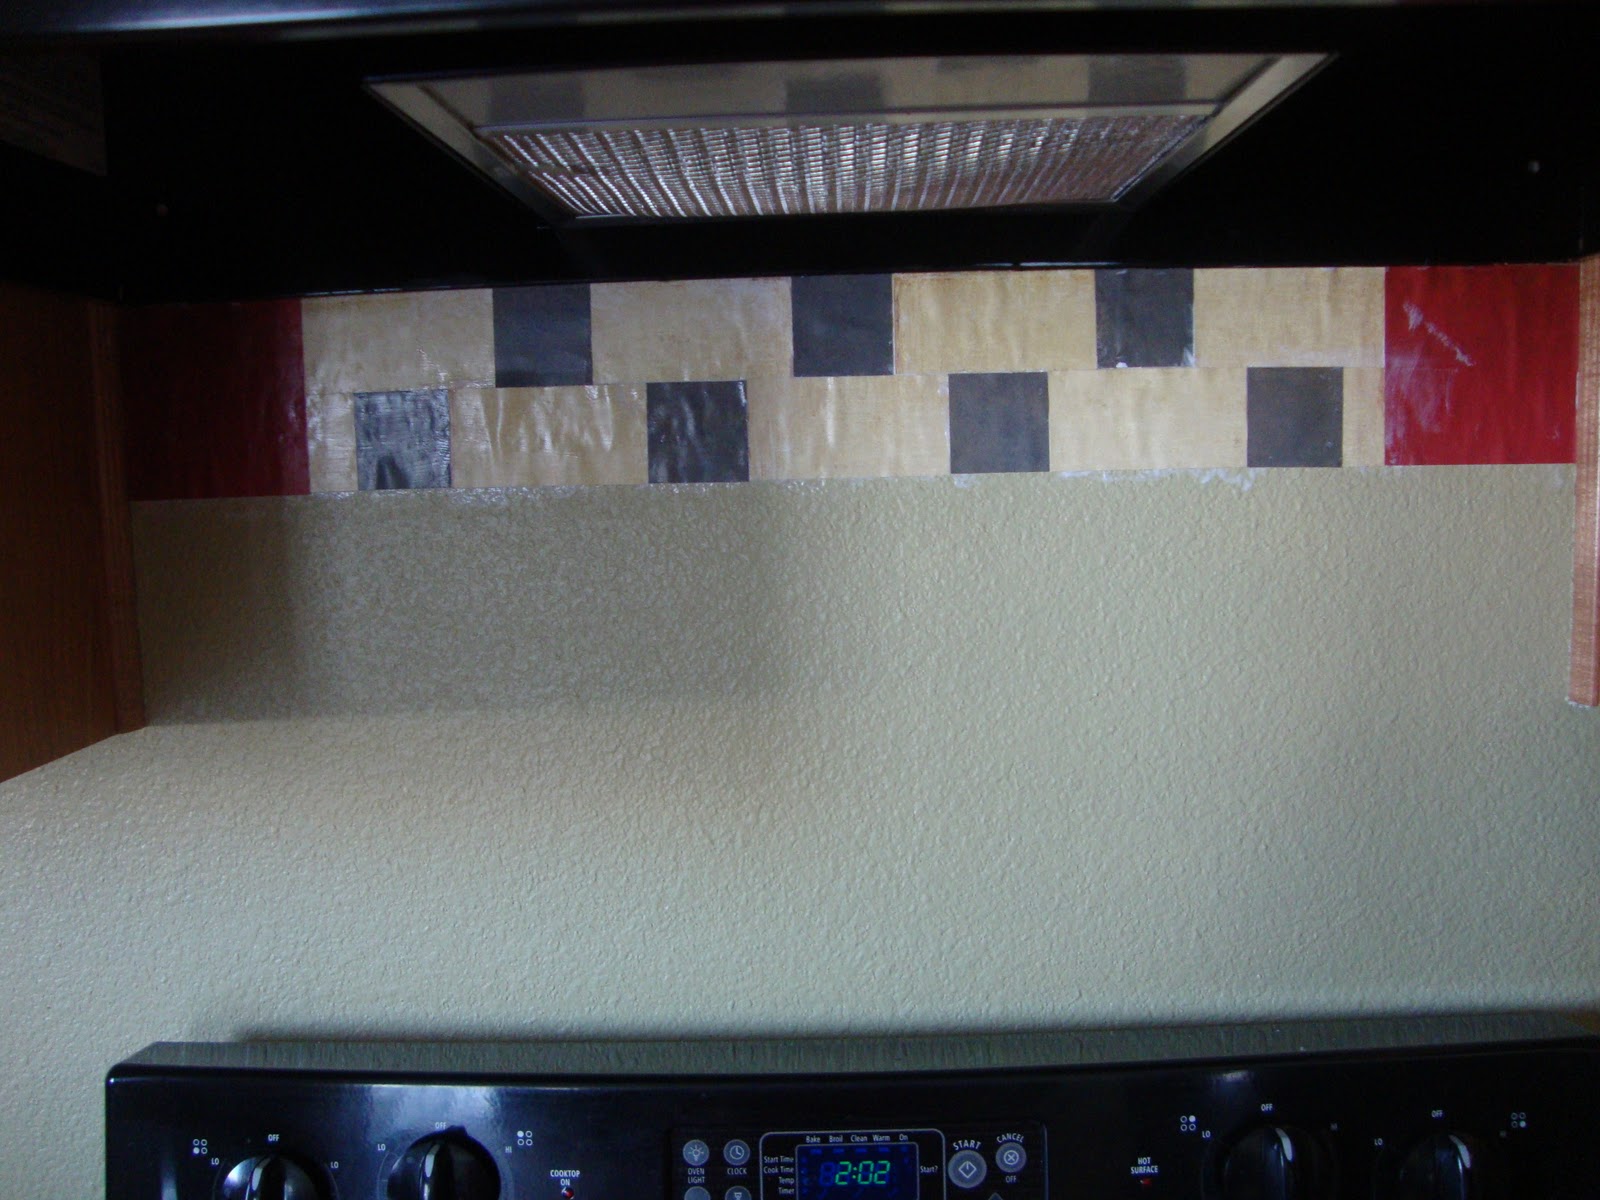
Just a plain old painted wall.  Nothing special and pretty boring.


The next step is to cut out your tiles and arrange them the way you want them. 

This made it really easy for the application process.  I just went in rows starting at the top and worked my way to the bottom.  I found the best way to attach was to put mod podge both on the wall and the paper.  It made it so that every part of the paper was sealed to the wall.

After the part above the stove was finished, I did above the counter tops.  To get the tiles to be perfectly diagonal, simply cut one paper in half diagonally and attach to the wall.  Once the bottom tiles are in place, the second row should fall into place perfectly. 

My tiles were a little too big to fit exactly, so I had to cut the top off of them.  The easiest way to get it just the right size is to fold it over and then cut along the crease that you made.

Once all of your tiles are in place, put the art tape along all of the edges to make it look like the grout between tiles. 

Add a layer of mod podge over the top to help completely seal the tape and paper.  Let it dry and later go back and use a varnish of some sort.  (I'll let you know when I do it to mine which kind I used)

Now, take a step back and enjoy!

It is an inexpensive and stylish way to add a backsplash.  I also added lights under my cabinets.  I didn't realize how big of a difference having light on my counter makes.  I love the way it turned out. 

Good luck!  Let me know if you have any other questions.  I would be more than happy to help in any way that I can.

If you decide to do this in your own home, I would love to see it!!  Send pictures to:

Don't forget to enter the Lizard King giveaway!  It closes tomorrow at 8 pm.
Also, don't forget to go vote for your favorite project!

Pin It!

Go Vote!!! CWTS Round 3

Alright peeps, it's that time again.  I made it through to round 3 in the Crafting with the Stars competition and the projects are posted.  I could definitely use your votes.  There are so many great projects to vote for, and I hope you like mine the best :)

This week, half of us are going to be cut!  Yikes!

Head on over and vote.  You know you want to!


Pin It!

Wednesday, February 2, 2011

CWTS Round 2 {My project revealed}

Thanks again to everyone that voted.  I hope that your vote was for me, but if it wasn't, that's ok.  I guess I can forgive you....this time.  :)  I made it to round 3!!!

Now, for the moment you've all been waiting for.  This round, my project was the......

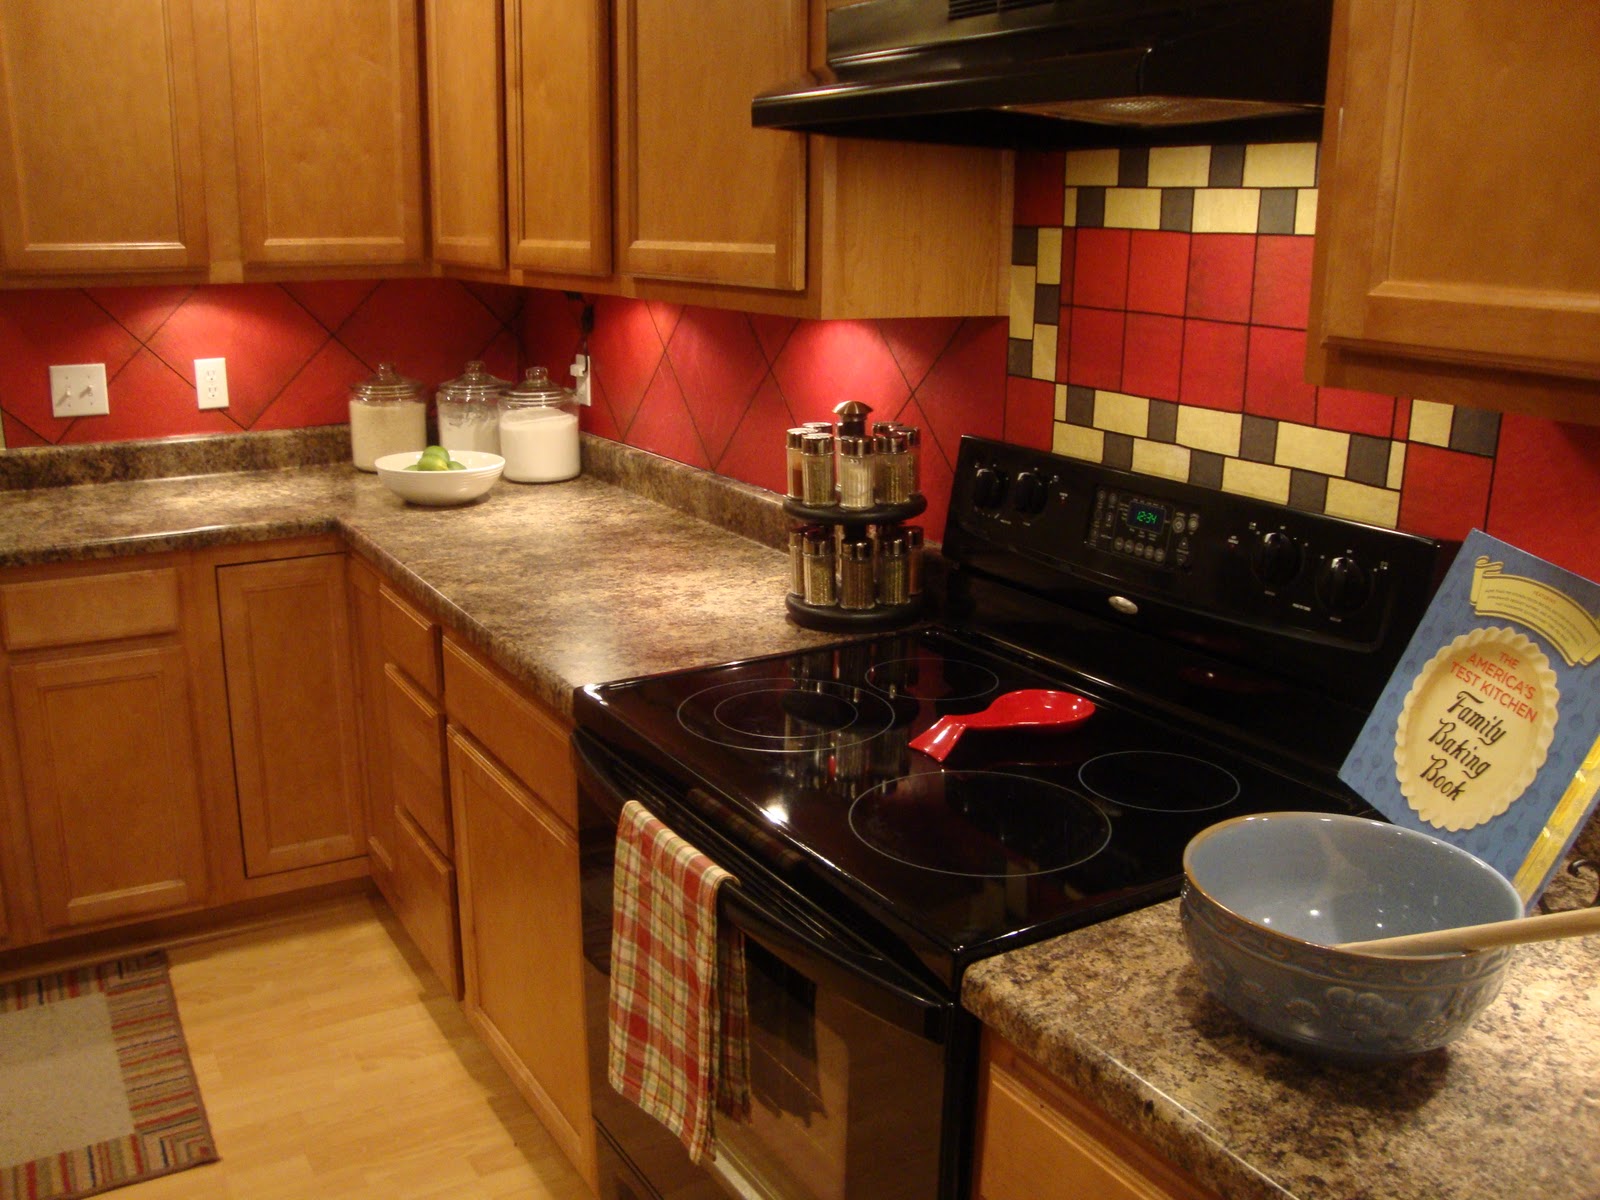
Decoupaged Kitchen Back Splash

(In case you didn't get a chance to read about my project on Sew Dang Cute's blog, here it is again.)

This week's challenge was a tough one.  Coming up with a decoupage project that hasn't been done a million times over on every craft blog seemed daunting.  I had a lot of fun with this project though, and am pleased with the results.

Using scrapbook paper, art tape and mod podge, I was able to create a functional and affordable back splash.

For those of you that are wondering about durability, a couple coats of sealant solve any moisture problems.

I love the color and warmth this adds to my kitchen and I may just be cooking a little more often.

 
Photos courtesy of Luminosity Photography

What do you think?  Did you guess correctly? 

I would be more than happy to do a tutorial on this if anyone is interested.  If not, just enjoy these beautiful pictures.  I know I love it.  Every time I walk around the corner into my kitchen, it's like a fun surprise to see all the color.  It's almost like my kitchen is saying, "come on, let's have some fun cooking!" 
Pin It!

Monday, January 31, 2011

CWTS Round 2

It's that time again!  Head on over to Sew Dang Cute to vote for your favorite projects.  If you happen to vote for mine in the process, I would love it!


I am pretty dang pleased with the way my project turned out and can't wait to show you which one is mine once the voting is over!
Pin It!

Wednesday, January 26, 2011

My CWTS round 1 project

First of all, thanks to everyone that took the time to vote.  Secondly, I made it on to the next round!!!!  The next theme is decoupage.  I have an idea of a project.  Hopefully it is going to be a winner!  I am going to be chatting it up with my star Kierste from Brown Paper Packages and see if we can wow you this next round.

Oh ya, and you can finally stop guessing which project is mine.  I made.....

The Laundry Folding Station


Did you guess right? 

Here are some close up shots of my project so you can see more of the details.


Thanks go to Rachel from Luminosity Photography for doing such a great job on the photos for me.

I am so pleased with the way it all turned out.  My husband told me he hopes I get to stay in this competition because it means parts of our house are going to look a lot better in the end. 

Thanks to everyone that has supported me through this, and I especially want to thank my mom.  She is the reason I can do what I do.  She has been a sounding board and a helping hand to me.  Love you mom!

Let me know if you have any specific questions or things you would like tutorials on. 

Yay!  I made it! (I'm just a little excited.)
It was totally worth losing part of my finger :) 
Pin It!

Monday, January 24, 2011

CWTS Round 1

The projects are up!  Head on over here to vote.  Will you be able to pick out which one is mine?  I dunno, but I hope so.  I could use the votes :)

Voting will go from now until tomorrow at 8PM.

There are so many amazing projects.  Hopefully I will get to move on!

Pin It!