Showing posts with label hair accessories. Show all posts

Friday, June 22, 2012

Patriotic Hair Bow Tutorial

 These hair bows are the perfect accessory for parades, family picnics, and firework watching during the fourth of July celebrations. 


They are so cute and easy to make that you once you start, you will want to keep going. Let's get started!

Supplies:
Ribbon
Cardstock paper (3 inches wide)
Needle & thread
Hot glue
Hair clip


1. Cut your cardstock to be 3 inches wide.  The height doesn't really matter.
2. Cut your ribbon at an angle and heat seal the edges with a flame.  This just makes it so the bow won't fray.  Then, I layered my ribbons one on top of the other and started to wrap it around the cardstock.  (only wrap twice)
3. You should cut the ribbon so that the end is the same distance from the edge of the paper as it was on the opposite end. 
4. While holding the middle of the bow, pull the edges of the ribbon up to form the bow shape.
5. Use a running stitch along the middle of the bow.
6. Pull the running stitch tight and then wrap the string around the middle several times to make sure that it is very secure.
7. Tie a not in a piece of coordinating ribbon. 
8.  Hot glue the not to the center of the bow.
9.  Attach the hair clip to the bow by clipping it to the ribbon and then hot gluing to the bow. Trim the excess pieces of ribbon and make sure to heat seal all edges.


Now you can attach it to a headband, or make two and use them in some cute little piggy tails.  Either way, these are really adorable and fun bows for any little girl to wear!


I know I love them!

Pin It!

POV {Patriotic}

It's time for Point of View again!  This month, the theme is Patriotic, and boy do we have some fun projects to share with you.  Check these out:

point-of-view-july-Collage-patriotic

Here are the links to the individual projects.  You should definitely click on them to find out more!

Sarah- Renewed Upon a Dream
Leanne- Organize and Decorate Everything
Ashlee- Topsy Turvy
Me-Just Between Friends
Amy-Ameroonie Designs

I love making fun hair bows for my daughters.  Here is my tutorial for how to make them yourself!


Now it is your turn!  I would love to see your Patriotic projects.  You can link up here and your link will be seen on all of the Point of View blogs!  Plus, we will be featuring our very favorite projects once the linky party is over.  You are welcome to link up as many projects as you would like as long as they fit the Patriotic theme!

Thanks for joining in!


Pin It!

Sunday, June 17, 2012

Crochet by Allie

I was recently contacted by Allie who is the owner of Crochet by Allie.  Allie sells all sorts of cute crocheted items that she makes by hand.  I wanted to share with you my entire experience from ordering to receiving my purchase in the mail because I think it was one of the best I've ever had!

I was able to choose one hat and one hair clip from the site to review.  I didn't realize just how hard that was going to be!  Talk about eye candy!  There are so many adorable hats and they are all customizable! 

These character hats are so fun.  You can customize both the color and the size.  Plus, if you order the monster hat, you can choose how many eyes, teeth, horns etc.  I love the options!


If you aren't into character hats, no biggie.  There are some other adorable options for everyday wear as well. 


After I chose the hat (I will show you which one I chose in a minute) I started looking at the hair accessories.  These are adorable as well.  I don't think I can say enough how much I love these.


Once I had made my choice, I ordered through the site and was pleasantly surprised by how easily I was able to choose all of my colors and sizing.  I checked out and waited for my items to arrive.  Little did I know that Allie would have the hat and bow made and sent to me 5 days later!  I was so impressed.  She was very fast in her delivery, and was so great to work with.

Now, the best part.  Here is what I ordered.  I got the Pom Pom Posh hat, and a cute bow in turquoise.  Allie even threw in a cute little flower bobby pin!


I like to refer to the hat as Lillie's pom pom hat of rainbow cuteness.  My items were VERY well made.  The quality was so impressive and the yarn is awesome!  I love the colors.  I just love it.  The bow is adorable too!  I was able to choose which type of clip I wanted on the back, and chose the alligator type clip.  It is perfect for me to use either in my daughter's hair, or even on a headband.  Love, love these!  And because I couldn't NOT show you how cute Lillie looks in her new hat, here's some cuteness for your viewing pleasure.


If you have been looking for a fun gift to give, or to buy for your own littles, I would definitely recommend Crochet by Allie as the place to go.  You will not be disappointed!

Check back tomorrow where there will be a fun giveaway from Allie!  You won't want to miss it!
Pin It!

Saturday, February 25, 2012

Sequin Flower Tutorial

In case you missed it, here is a tutorial for a fun sequin flower that I created for the Brassy Apple "Bling it" series.

To make this flower you will need:
*Sequins (I got mine at Hobby Lobby.  They need to be the kind that have the tiny hole at the bottom
                 instead of the kind that have a hole in the middle.)
*2 felt circles (4 inches)
*matching thread
*crystal beads
*needle


Begin by folding the sequins in half with the hole at the bottom. 


Next, using your needle and thread, begin attaching the sequins to the felt in a circular pattern starting on the outside.


Once you have the center sequins in place, use a little dab of hot glue to attach the crystal beads.

The bottom of your flower will have all the thread showing.  To give it a more finished look and more stability, hot glue the other felt circle to the bottom.  Last, attach whatever kind of pin or clip you would like and you are finished!  Now it's time to try it out!

I thought it would be fun to wear it on a scarf.

And of course this flower would look great in the hair as well.  (Yes, I made a pink one too.)


There you have it!  Some bling that would be the perfect accessory to jazz up any outfit.

You can find me here:
Pin It!

Tuesday, November 9, 2010

Back in Action and a {Giveaway}

I realize that it's been about two weeks since my last post.  I promise to make it up to you in the next couple of days.  It has been a crazy couple of weeks for me.  My sister is getting married in a week and a half and I have been helping my mom get things ready for that.  Also, her bridal shower (that I am hosting) is this Saturday.  My husband has been out of town for a week and won't get back until Friday.  So, in a nut shell I have been a little overwhelmed lately.

Even with all of these things though, I have been crafting and will show you what I've been up to a little at a time. 

First, I wanted to ask you a favor (there may be a little something in return)

I have been toying with the idea of making and selling hair accessories.  Be honest with me.  Would you buy these?


Which ones do you like?  What other colors would you be interested in? 

Leave me a comment with some feedback and you will be entered to win one of these lovelies. 

It gets even better!  I am actually going to give away TWO!!!  So leave me a comment and make sure you are following my blog.  Easy enough right?  Make sure to comment by Friday, Nov. 12 because that is when I will choose my winners.

Thanks for your help and patience with me.
Pin It!

Saturday, September 11, 2010

Poofy Flower

These flowers have been all over the internet, but if you are like me you haven't gotten around to making one yet.  I finally decided to give it a try because I knew it would be so cute in my daughter's hair.

Here is how I did it:

Supplies:
tulle
felt
hot glue gun
elastic headband

1. Begin by cutting out a lot of tulle circles.  (I think I ended up with about 40-50.  I didn't really count though.) Also cut out two felt circles.  The circles don't need to be perfect.
2. Fold tulle circle in half and then half again and then hot glue it to the middle of one of the felt circles.
3. Repeat the folding and glueing circling away from the first piece you glued on.
It should look like this as you go:

4. Glue completed flower to headband and then glue the second piece of felt on top to secure it in place.

That is it!  I love the way it looks on Lillie.  We will just have to see if she will keep it on or rip it off her head. 

Here are a couple of things to keep in mind while making your very own flower.
1. The bigger the felt circle, the bigger the flower and the more tulle you will need to cut out.
2. Hot glue burns fingers.  To avoid getting burned, use a wooden skewer or dowel to hold the circle in place while the glue dries.  Trust me, you will want to follow this one :)
3. You can use any size headband.  I chose to use a thicker one, but I have seen the flowers on the skinny elastic bands as well.  It is personal preference. 

*FYI- I got my headbands at good old Walmart
 
Pin It!

Monday, August 23, 2010

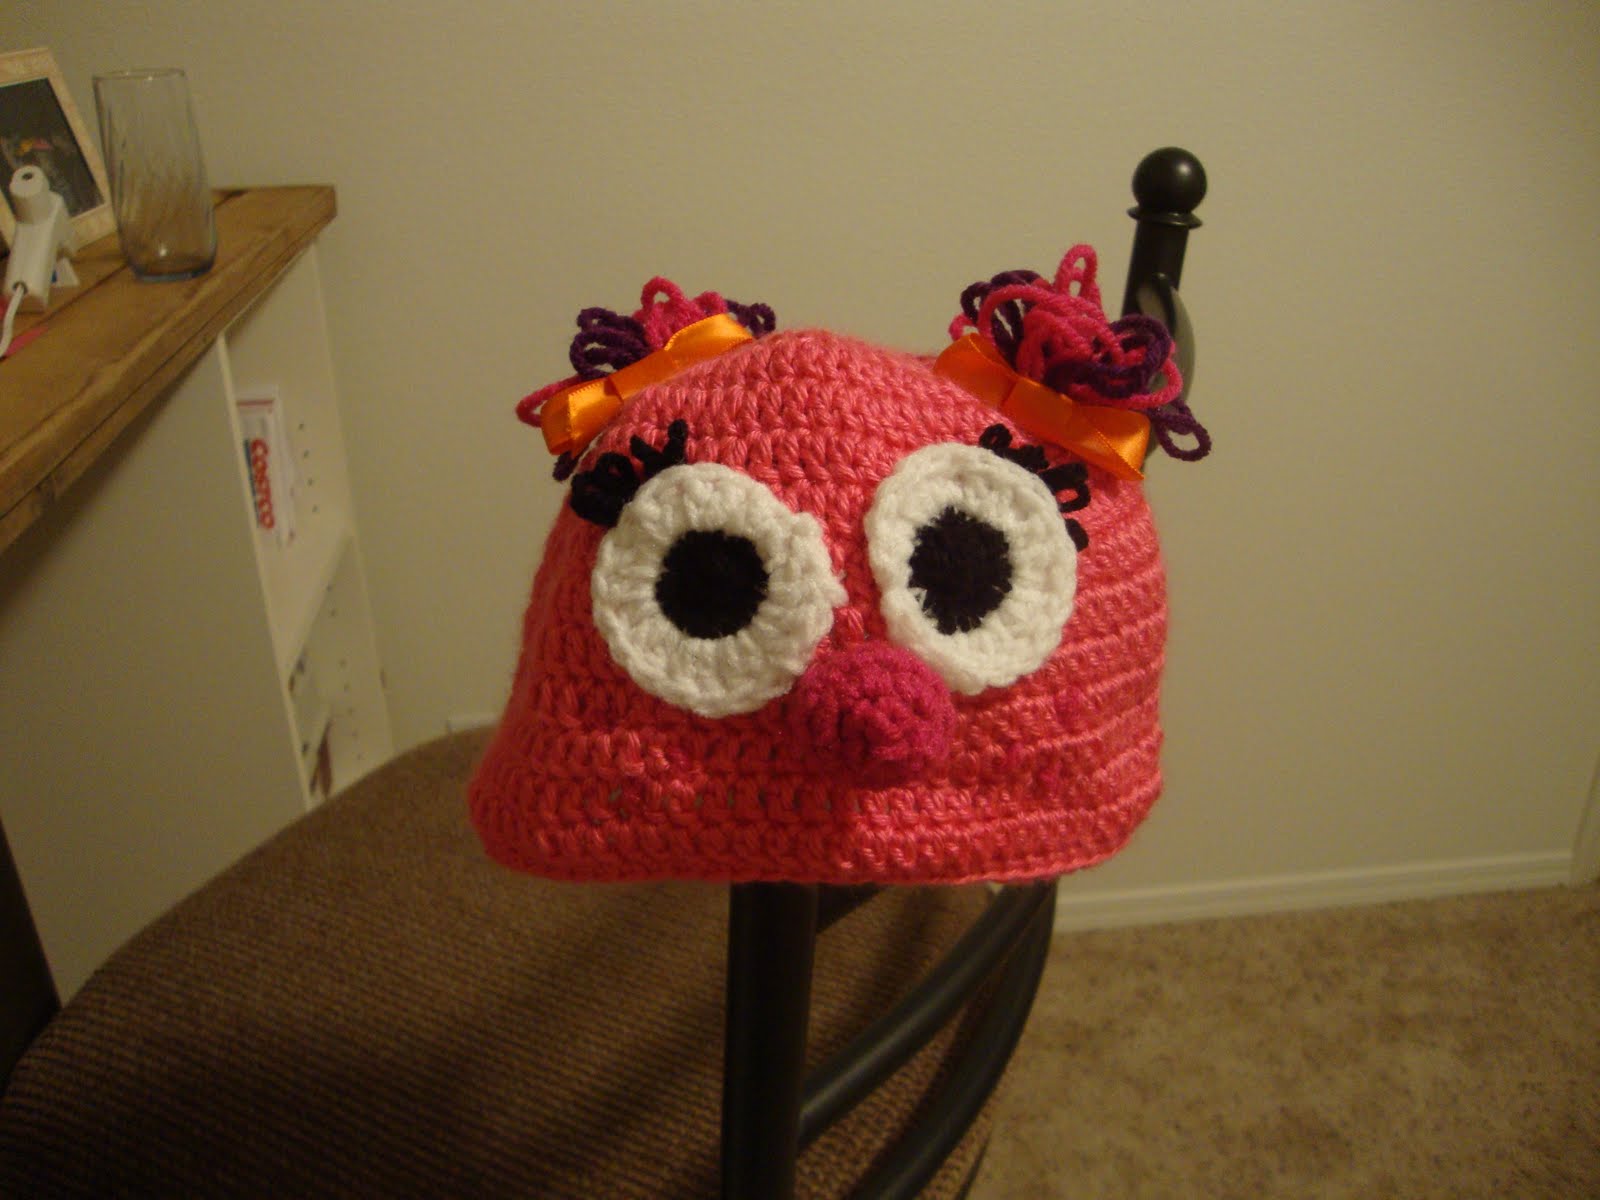
Fun Kid's Beanie

I am sure if you have seen Sesame Street lately you have seen this little character named Abby Caddaby.

I decided that I wanted to make a fun character beanie for my daughter using Abby for inspiration.  Here is the way it turned out:


And this is how I did it:

Supplies to make the beanie:
Yarn
G crochet hook
Yarn needle

For the beanie:

CH 3, join with a sl st to first CH to form a ring


Round 1: CH 3 (counts as first DC), 7 DC in ring, Join with sl st to top of begining DC (8DC)

Round 2: CH 3, DC in same st, 2 DC in every st around. Join (16DC)

Round 3: CH 3, 2DC in next st , *DC in next st, 2 DC in next st * Repeat * to * around. Join (24DC)

Round 4: CH 3, DC in in next st, 2 DC in next st *DC in next 2 st, 2 DC in next st* Repeat * to * around. (32DC)

Round 5: CH 3, DC in next 2 st, 2 DC in next st *DC in next 3 st, 2 DC in next st* Repeat * to * around. (40DC)

Round 6: CH 3, DC in next 3 st, 2 DC in next st *DC in next 4 st, 2 DC in next st* Repeat * to * around. Join (48 DC)

Round 7-14: DC in each DC

Round 15: 1 SC in each DC around


For the eyes:

CH 3, join with a sl st to first CH to form a ring (use black yarn)

Round 1: 5 DC in center of ring, join with sl st

Round 2: 2 DC in each DC (use white yarn)

For the nose:

I used this video from youtube.  It made it so much easier to see the whole process.  This is the pattern from the video.

Round 1: 3 SC in 2nd CH from hk. DO NOT JOIN. Work in one continual round.


Round 2: 2 SC in ea SC around. (6 SC)

Round 3: 2 SC in ea SC around. (12 SC)

Round 4-6: SC in eac SC around. (12 SC)

Round 7: SC DEC over two SC, 6 times. (6 SC DEC)

Stuff head with polyester fiber fill or stuffing for shape

Round 8:  DEC around until closed, tie off.

Putting it together:
Use a yarn needle and yarn to attach the eyes, nose and hair.
I also used black thread on the eyes to create eye lashes.

I made the little bows because I thought it would be fun to have a little more color on the hat, but they aren't neccesary.

Good luck!  I am going to attempt to make a cookie monster beanie as well.  We shall see how it turns out.

Be sure to visit later this week for another fun idea! 
Pin It!