Showing posts with label dress. Show all posts

Friday, May 25, 2012

Bandana Dress Tutorial


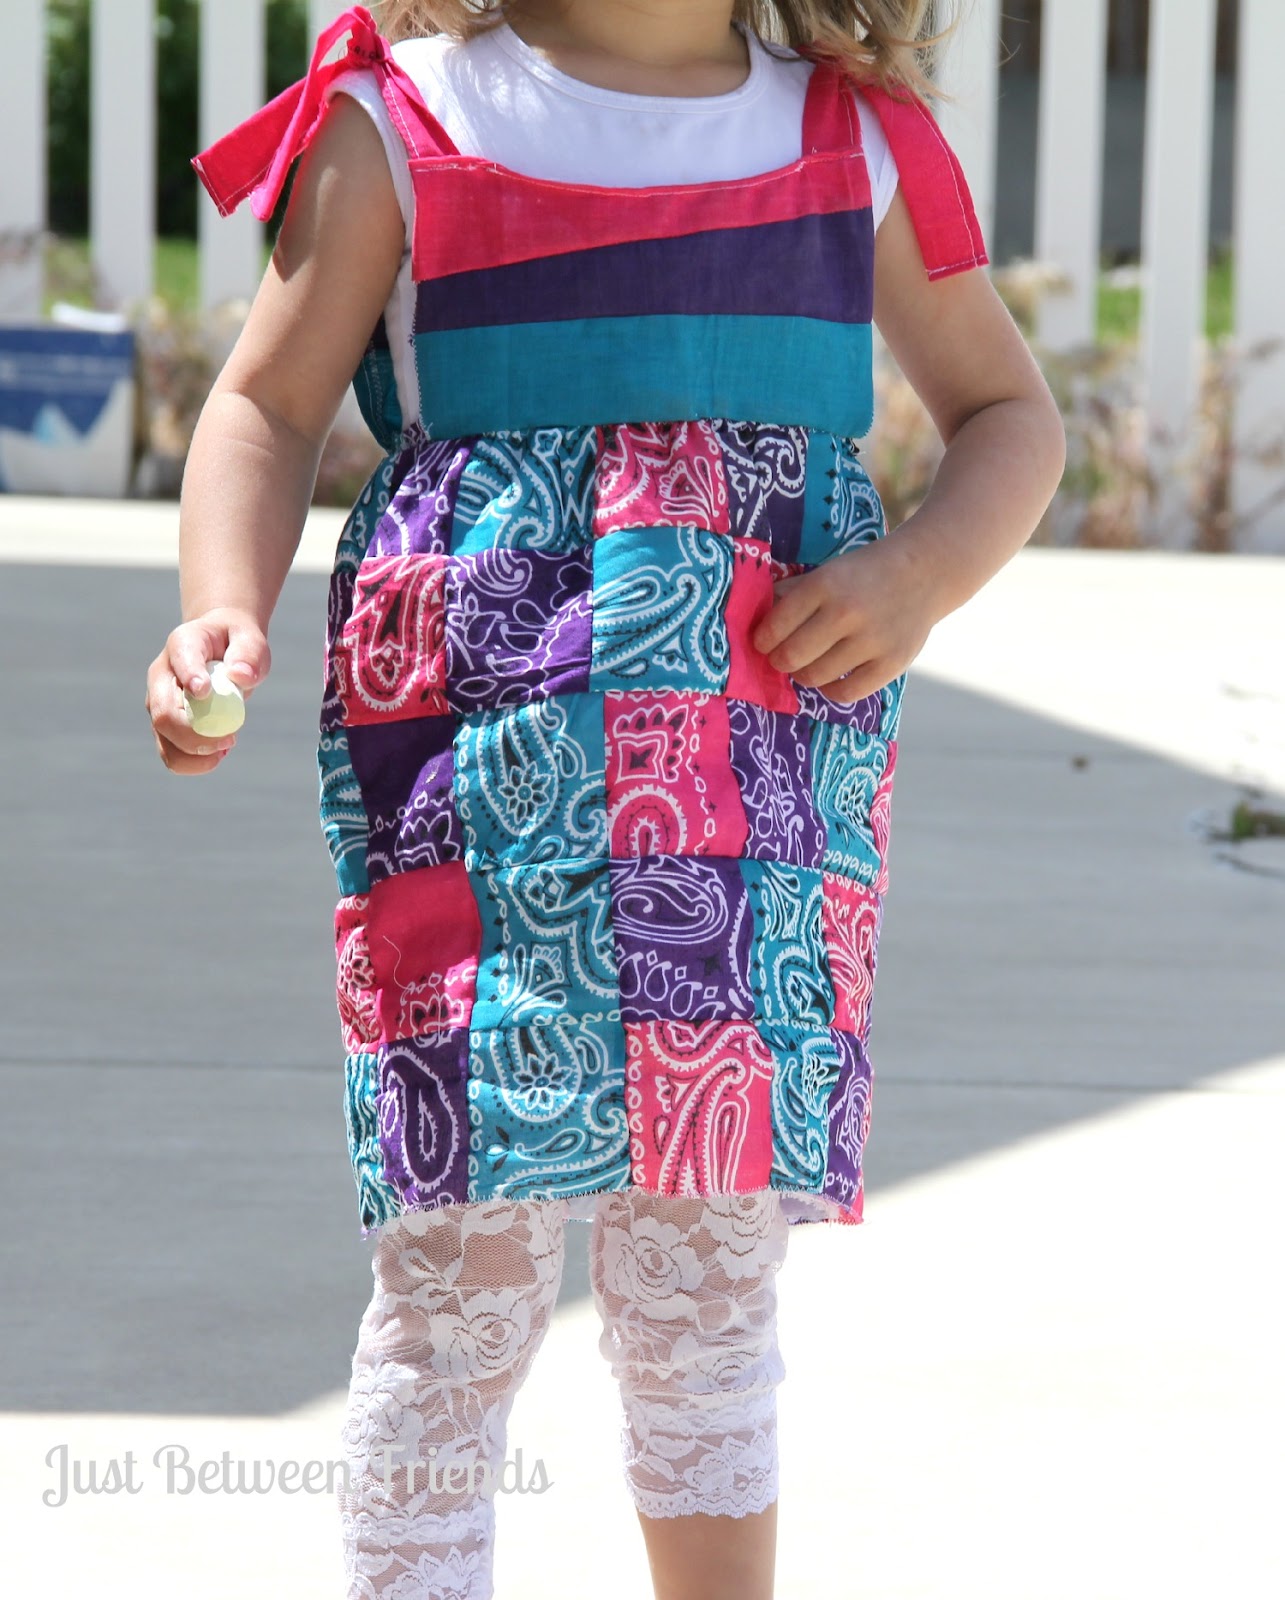
Here's a quick summary of how I made this fun dress.

Using scraps of bandanas that I was given, I pieced together this fun outfit. The squares are 3 inches by 3 inches, and I used 11 squares in each row with 5 rows total. The amount of squares you would need would vary based on the size of the little cutie you are making the dress for.


The top was really simple. It is two panels, one for the front and one for the back. To get the fun zig zag look, I simply took the strips of fabric (they are 2 inches wide) and cut them so that one end was 2 inches and the other is 1 inch. (see photo below.)  Since they end up the same measurements, they fit together like a puzzle leaving the edge completely straight.  I cut the pink and the purple pieces at the angle, but left the turquoise piece straight.  Then I sewed them together to form the front and back parts of the dress. One thing that you can't really tell from the photo is that the strips are doubled over.  I did that so I wouldn't have to use a lining on it. 


The skirt is lined in a lightweight white fabric because of the fact that without it, the dress is see-through. It also has an elastic waist band.  To finish the edge, I simply did a zig zag stitch on both the colored fabric and the lining.


The straps were tricky for me. I wanted to just have them permanent, but to have the dress fit the way I wanted it to, there would be no way for my daughter's head to fit through the opening. So I went with a simple tie. I used two strips of fabric. One was attached to the back piece and one to the front, and then you tie them together to hold the dress up. Really easy and effective.


In the end, this was the perfect play dress.  I paired it with the fun sequin flower I made and it was a really cute outfit for her to wear.

Since this tutorial is really not comprehensive, if you have any questions, please ask me.  I am always more than happy to clarify or answer questions. 
Pin It!

POV {Summer/Vacation}

Once again, it's time for our Point of View reveal.  I must admit that I almost forgot about this one.  Luckily though, I finished my project just in the nick of time and have it ready to show you.  Hopefully you weren't as absent minded and are ready to link up your fun projects for me to see.  Here are all of our projects.


1. Tone- Bless by Tone
2. Amy- Ameroonie Designs
3. Me- Just Between Friends
4. Ashlee- Topsy Turvy
5. Gwen- Gwenny Penny
6. Leanne- Organize and Decorate Everything

So many cute projects.  You need to click over and take a look at them all!  As for my project, I don't have a full tutorial.  After unpicking and re-sewing the sleeves about 5 times, I didn't really want to worry about taking new pictures as I went.  If you would like to see a mini how-to, click here.


Now it's your turn.  I would love to see any projects that you have that fit under our theme of Summer/Vacation!  Just like last month, the link party will be hosted on all of our blogs which means that no matter which blog you add your link to, it will be visible on all six of them!  Plus, we will be featuring our favorites from the linky party which means great exposure for your blog as well!  So go ahead, link up!


Pin It!

Wednesday, October 20, 2010

A Little Dress for my Lillie

A while ago, my sister Annie went through her closet to get rid of all the clothes that didn't fit her anymore.  I just happened to spot a fun pink top in the pile that I thought would make an adorable dress for Lillie.  Last night I finally tried it out and it did turn out so cute.  I didn't do a tutorial on it because I was just making it up as I go and failed to take pictures, sorry.  But I do have a tutorial on how I made the flower on the dress.  Without further ado, here is the finished dress.


 I decided to cross the straps in the back because I thought it was cute. :)
 Of course I had to take pictures with her actually wearing it.  What kind of a mom would I be if I didn't show off this cute face.


How to make the flower:
Start with ribbon.  Sew a running stitch and then pull one thread to gather it.

Cut out a circle of felt
Hot glue the ribbon along the circle however big you want to make it.  After the first loop around I added some tulle to give it another dimension.
Bring your ribbon around again and finish with an embellishment in the center.  I got mine at Micheal's in their $1 bin.
I finished it with a clip on the bottom so that I could use it on the dress or in Lillie's hair. 
(The picture below shows the tulle a little bit better than the others)

Hope you like it! 

Pin It!