Showing posts with label Home Decor. Show all posts

Saturday, December 8, 2012

Christmas Decorating

There is something about having Christmas lights on in your home that feels so cozy to me.  I love the way it looks and feels.  One of my favorite things to add lights to is my mantle above the fireplace.  Getting cozy next to the fire, drinking hot chocolate with only the Christmas lights on.  Now that is a very nice place to be.


The NOEL is a fun kit that I purchased at The Wood Connection and made with my mother in law and sisters in law.  It is a really simple, easy and CUTE decoration.  Plus it was really inexpensive to make it as well.


I try to keep things pretty low key around here as far as decorating for the holidays goes.  I like to have a simple touch here and there instead of filling every single space in my home with something.  Here are a couple of those simple things that I like.

Do you remember my snowman kits from last year?  I made one for myself and I still love it.  I currently have this little guy sitting on my piano.  


This is my all time favorite Christmas decoration ever.  My mother in law gave me this manger set several years ago, and it is simple and beautiful.  (Just the way I like it)


Last, I will show you my entry table and my tree all at once.  My tree is a sad little thing that I have had for years.  I inherited it from my parents who had it since I was maybe 4 years old.  This tree has lived a long life and is well loved.  My daughters have decorated and removed decorations enough on the tree that I think a pretty shot of the tree from afar will suffice. :)


There you have it.  A few Christmas touches around the house that makes it feel festive but not overwhelming.  I love it.

Pin It!

Monday, December 3, 2012

DIY Flower Pillow

The other day I posted this photo of a flower pillow I had made at a Super Saturday activity on instagram and I had a HUGE positive response of people wanting the tutorial for how to make it.

felt-flower-no-sew-pillow-tutorial

I LOVE the way my pillow turned out.  Here's how mine differed a little from the original tutorial that you can find over at H is for Handmade.  I used wool felt instead of craft felt because of a couple of reasons. #1 I love the saturated colors that you can find in the wool felt.  It is a much more vibrant color.  #2 I figured that if I was going to take the time to make this pillow, I wanted it to be as sturdy as possible.  Wool is much more tightly woven then the craft felt which makes it more durable.  It is a little more expensive (by about $3 a yard) but it is SO worth it.

The second thing that I did differently is that I decided to go with a patterned pillow instead of a plain colored one.  I really think it added a lot by doing that.  Either way is REALLY cute, but I just liked the color against the grey stripe.  I bought my pillow form at IKEA and is 20"x20" and the fabric/felt came from one of my favorite fabric shops over at Gardner Village called Pine Needles.  (They have amazing selection and quality.)  The pillow I covered in a simple envelope enclosure pillow case. If you can't sew, no problem.  Just get a pillow that already has a fun color or pattern on it.

This is a no sew flower which is awesome because that means it is finished quickly.  From start to finish (including the time to sew the pillow case) this pillow took me 1 and a half hours to make.  Not bad!  I used hot glue to attach the flowers instead of fabric glue and it worked like a charm!

Here's my one tip for making this.  I would cut all the petals out first.  Then, going one row at a time, glue the ends of all the petals to give it the rounded shape and attach to the pillow.  It will make things go so much more quickly.  Go read the original tutorial for more tips and tricks for making this!

Good luck!  Let me know if you have any questions!  I would be happy to help!
Pin It!

Wednesday, November 14, 2012

The Loft

There are several rooms in my house that I need to show you at some point.  Today I am going to show you one of my favorite areas that up until this last week was pretty much unused/ unusable.  You may remember our DIY built in bookshelves that I posted about not too long ago.  The bookshelf is located in "The Loft" which you will find at the top of the stairs. Let me give you a tour of the area that I worked on while my husband was out of town last week.


If you will imagine with me, this room used to be all dingy white colored.  There was no beadboard or trim, and there really was no life to the loft.  All that was in it was a large love sac, a play kitchen and the bookshelf that was recently added.  It was a nice space, but we couldn't really relax and it didn't really have a purpose.  Now it does!  This loft is now a place my family can sit and enjoy together.  We can read and play in this area and it doesn't require sitting on the floor!


As you can see, I finished the bookshelf and added our books and some other decor items that I thought would look nice.  I am still finessing the way it all looks, but I am pleased with the way it is going so far.


The whole thing started with the bean bags and chairs.  I will tell you more about the bean bags in another post, but will tell you about the chairs now.  I scored these awesome chairs at the local thrift store (DI) for $40 for the set!  Seriously.  They are pristine!  There isn't a scratch or a stain on either one of them.  I was originally thinking I would recover them, but once I got them into the loft, I kind of fell in love with the way they looked with everything.  I may change my mind later on, but for now, I will keep them this way (minus one idea I have that I may or may not try.)


In the name of keeping things "real" around here, this is what the rest of the loft looks like currently.  I have HUGE plans for this space including a large L shaped desk and cabinets so that we can keep our computer out in the loft.  When I was adding the bead board and trim this last week, I made an executive decision not to do anything to the desk area until I knew the measurements of the desk so that I wasn't wasting any time doing things that would be covered up anyway.  That is why the paint and the baseboards stop suddenly.

Well, there you have it.  The project that I worked on while John was out hunting.  I will be showing you some of the details and the how-to's (sort of) the rest of the week.  Let me know if you have any questions about anything!


Pin It!

Wednesday, October 3, 2012

A Work in Progress {Built in Bookshelves}


My husband and I have been working on this project for a very long time now.  I'm talking over a month!  It is the project that never ends. At least it feels like it.  I wanted to show you where we came from, and where it is now. I will update you as we update the room that way you can see the process.

We began with a set of bookshelves that my in laws had removed from their house and gave to us.  (Lucky us!)  I knew that with a little TLC that we could make it look like something that we love, and guess what.  I was right!


The first step was bringing the bookshelf into the house and putting the different pieces where we wanted them.  As you can see, the bookshelf is in pieces.  I told John which piece and wanted and where.  Then he centered them on the wall and attached them using screws into wall studs.  It was a big task. Once it was in place, we lightly sanded the whole thing.

This is where John and I got frustrated with things.  We wanted to add crown molding to the top, but then came the task of figuring out angles and doing math.  Let's just say that there was a lot of thinking going on.  We would measure and re-measure before making cuts and it would still end up being wrong.  Ugh.  The angles on the bookshelf were just really difficult for us to work with I guess.  We got it in the end, so there's a pat on the back for us.  The reason for telling that story is to tell you why I didn't take as many photos as I should have.  When you work on something for a full day that should only take you an hour to do, it's a little frustrating.


Now to give you the run down of what I did to everything.  I added beadboard to the walls on either side of the bookshelf.  I LOVE the way it looks.  I decided to use the beadboard so that the lines were going horizontal instead of the traditional vertical.  We framed it out with some trim pieces, and even added new baseboards.  I did all of the attaching with a nail gun and it worked great.

We also added trim to the whole wall by the ceiling.  I LOVE this too!  It really gave the look of a built in. If we ever decide to move, this will be something that will raise the value of our house.  It definitely makes a statement.  Once it was all added, I caulked and filled every nail hole and crack.  This makes the painting go much smoother.

The next part was the most tedious.  Painting.  Ugh again.  We added seven (SEVEN) coats of white paint to get complete coverage.  Did I mention that it took us over a month to complete?  Ya.  This is what took up the whole time.  In the end, it is totally worth it because it really brightens up the room, updates the bookshelves, and brings a great new look to our upstairs loft.


I had a little problem that I had to solve.  It included the back part of the bookshelf.  My inlaws had light switches in the back of some of the bookcases.  This was great for them, but we didn't have light switches there.  The problem: there were holes in the back of the bookcase.  I used foam core and fabric from Hobby Lobby to create panels that fit exactly behind the shelves.  Problem solved!  Well, almost.  I bought four yards of fabric initially thinking it would be enough.  It covered everything BUT the middle section.


It is like looking at a whole new bookshelf.  (Well, cause it pretty much is.)  The panels were so easy to make.  All I did was measure the dimensions of the bookshelf and cut my foam board to size and had to attach some extra pieces together to make big enough pieces.  I used duct tape for that.  Once it was the proper size.  I would lay it on top of my fabric piece and then cut around it leaving an inch of fabric around the side.  When I had it all cut out, I simply taped the fabric to the back of the board.  I didn't need to attach it to the wall because the shelves will hold it in place.

This is where I will leave you.  I did get the rest of the fabric panels in, and the shelves up, but I don't have photos of it yet, and I have a little bit of touch up to do before I can show you more.  

What do you think?  Is this something you would do?  Here is a before and after for your viewing pleasure.  I can't wait to show you how it all turned out in the end, complete with books and everything!


Pin It!

Friday, August 24, 2012

Oversized Ruler Growth Chart

Post edit:  If you are local and would rather purchase a ruler than make one, I would be happy to do it for you!  You can purchase it for $30 over in my shop.


My project is something that I have wanted to do for a long time and am so glad that I took the time to do it this month.  It turned out even better than I could have hoped for and so much easier and inexpensive than I thought it would be!

Growing up, we had a wall that we used to track our growth on.  It is something that we look at quite frequently at my parent's house.  Whenever people would come over, they were always measuring themselves to see where they measured up to.  My dad is always at the top since he is a tall 6'7", although if you ask him, he would tell you that he is 5' 19". Oh dad.


The problem with having a wall that you use to track growth is that people move and you want to paint walls but can't because you would be painting over something that is irreplaceable.  That is where my oversized ruler growth chart comes in handy!


You will start with a board from your local Home Depot that measures 1X8X6.  If you can't find it, tell the people that work there that measurement and they will be able to show you right where to go.  You will also need to head over to the paint department and grab some stain.  I used Minwax "Honey" stain.  I think it is a perfect not-too-dark and not-too-light color.

Sand the board so that it is smooth and then apply the stain.  I used a paint brush and painted it on in little sections.  Once you paint it on, wipe it off with a rag immediately so that it doesn't get too dark.

Last, I cut out some vinyl using my silhouette machine and applied it to the board.  If you don't have a vinyl cutting machine, you can also just use a stencil and paint.


There you have it!  A fun and functional way to keep track of your family's growth! I used a Sharpie marker to write in the name and the date.


Pin It!

Friday, March 23, 2012

Pinterest inspired wreath

This is probably one of my favorite wreaths that I have ever made.  I love the colors and that it is perfect to leave up for Spring and Summer!


I was originally inspired by this wreath that Kiki made on Kiki Creates.  If you don't follow her blog, why not?  You should.  She has talent.  Here is a look side by side of her wreath and my wreath.

         Photo courtesy of Kiki Creates


Anyway, as soon as I saw it I knew that I would be making it as some point in my life.  When we decided to do a pinterest themed month for Point of View, the perfect opportunity presented itself to me. 


It really is simple to make.  It takes a little while to get everything assembled once you have all the flowers made, but it was so fun to make.


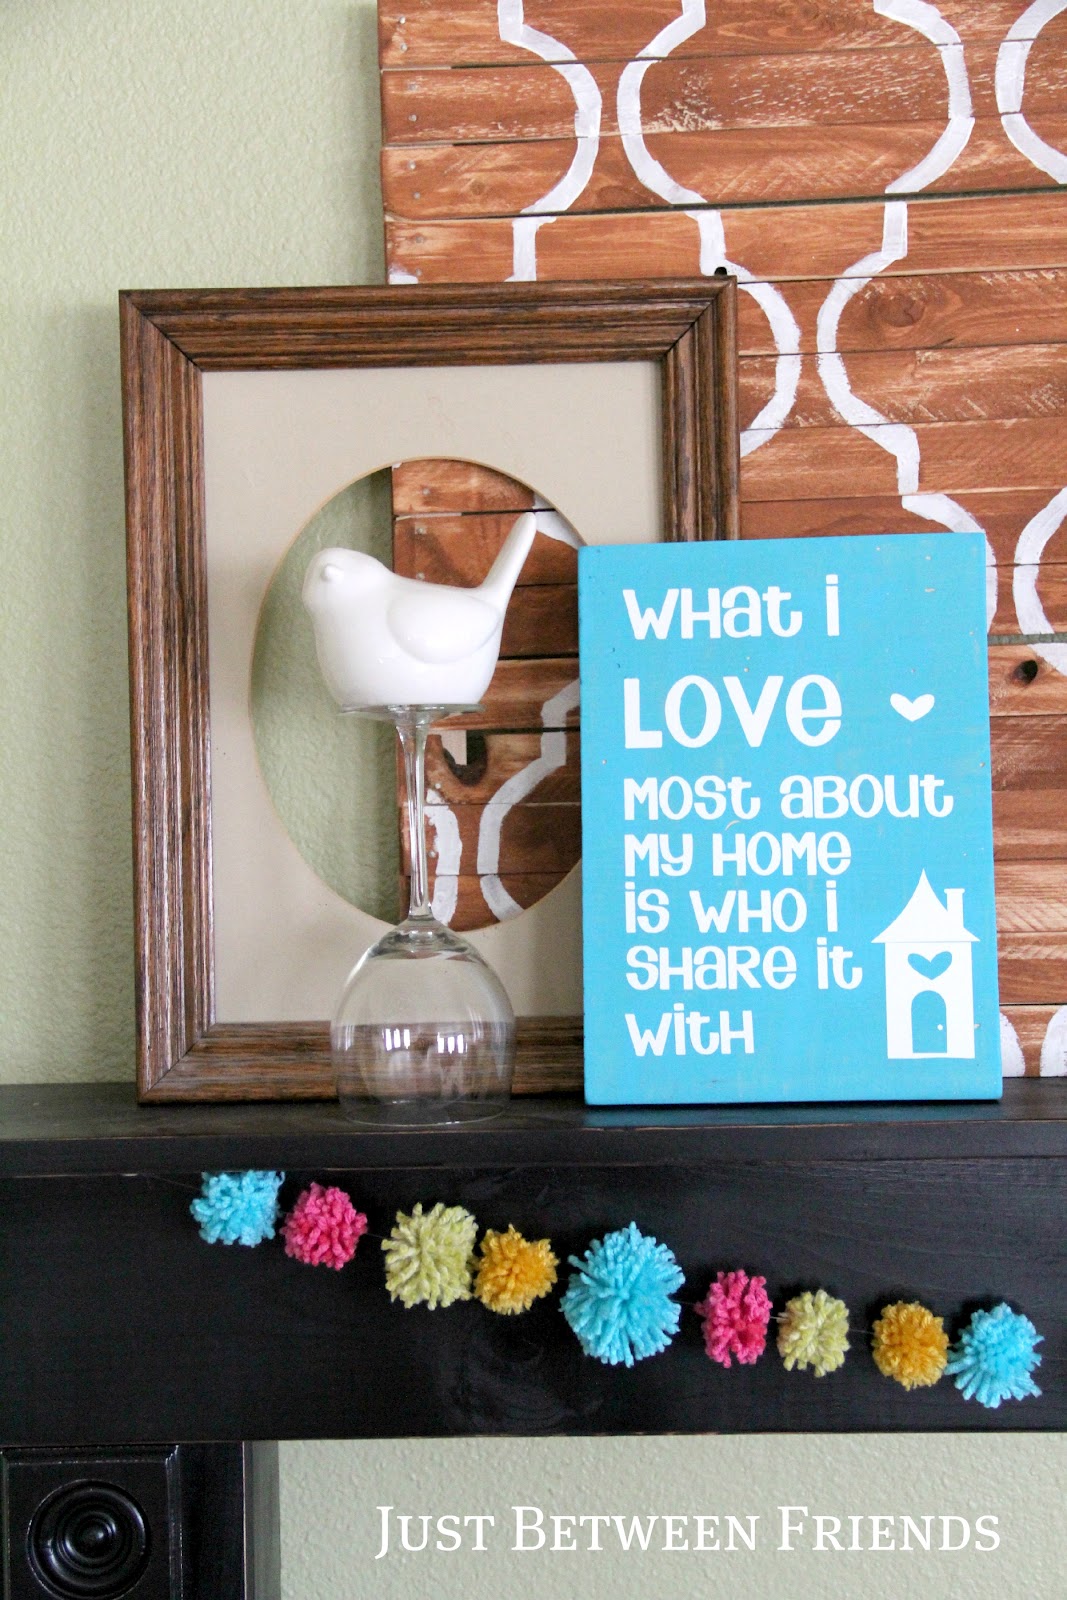
Here you can see it close up with my quote that I made earlier this week.  Plus the pom garland that I made for Point of View last month.  I really just smile everytime I look at my mantel now.  It is so bright and fun.


Pin It!

Saturday, March 17, 2012

It's Quote-able

I can't lie.  Finally getting to some of my pinned projects has been so fun for me this month.  I can't wait to show you the project I picked as my Point of View Project, but for now, I will show you a simple project that anyone could do.


I found this quote on pinterest and knew that I needed it somewhere in my house.  My life lately has been very sweet.  I haven't been so happy, so in love, so at peace, and so able to be a good mom in such a long time.  My relationship with my husband and my children is at a perfect peak, and I love it.  I feel like I am able to do so much more as a wife and mother than I ever have before.  I don't think any one thing has changed, except maybe my attitude and my outlook on life. 


My family is the most important thing in the world for me.  This quote is helping me to keep that in perspective.  I have all sorts of projects that I love that I have done around my house, but I love the people in my home more than any project I have ever done.  So, even though I want to spend an entire day or even a weekend finishing my craft room and master bedroom, I would rather take it one little project at a time and spend time with my husband and my girls. 


Now that I have told you why I like the quote, let me tell you how I made it really quick like. 

I simply used a scrap piece of 8 in X 11 1/4 in wood that I had in the garage, sanded it, painted it and let it dry.  Then I cut the vinyl out using my Silhouette machine and attached it to the wood. 

Ta-Da!

If you are interested in making this sign in your own home, but don't have access to a vinyl machine, I would be happy to cut one out for you.  The cost for the vinyl would be $8.00 including shipping.  (if you are international, please add $1 to the price.)  Just email me and I will get it sent out to you.  joniemarie85@gmail.com

Also, if you are interested in following along on my pinterest boards, you are more than welcome to.  If you aren't signed up for pinterest yet, what are you waiting for?  Send me an email and I will help you get set up!
Pin It!

Friday, January 27, 2012

Burlap and Felt Bunting

I decided that my mantel needed some bunting love.  I love the texture that the burlap and felt had together and that is where it all began. 

I started by cutting out some burlap rectangles and some felt hearts.  I used the old trick- fold the felt in half and cut out one side of the heart to make a symmetrical shape- and then used that heart as a pattern for the rest of them.


Next, I top stitched the felt hearts onto the burlap.


I found some brown grosgrain ribbon in my stash and used it to sew the burlap to.  I simply folded the burlap over the ribbon until it was a square shape and then sewed straight across.


I decided to do every other square with a heart on it and I continued sewing until I ran out of ribbon space.  Then I hung it up on my mantel to enjoy!


I couldn't just stop there though.  I loved the hearts and decided that I needed a banner up on my wooden sign.  I simply cut out a zillion hearts (at least that's what it felt like) and then sewed them together. 


This picture may be just a little bit cryptic.  I intentionally didn't show you the other side of my mantel.  Why, you may ask?  Well, I had one other thing in mind for the other side that I didn't want to show you until it was finished.  I didn't have the right light to take other pictures once it was finished.  Check back in a couple of days for the complete mantel picture. :) Plus, I will show you my mini mailboxes up close and personal like.


 I hope you like my lovey dovey mantel as much as I do.  I really feel like the buntings add so much fun to a space.  And don't forget to go link up your love projects on Gwen's blog!
Pin It!

Thursday, January 5, 2012

Music Room Artwork {Part 1}

I am a band nerd.  Seriously.  I played in the band from the time I started 7th grade until I graduated college.  My major, you ask?  Music.  Yep.  I am that cool.  I have now been playing the flute for 15 years and I still love it.  I get to use my flute training as a teaching tool now and I love being able to teach all of my students.

The flute is played in the treble clef. If you aren't sure what that is, basically it just means where the notes played in the higher range are written. 

****If you are still reading, I think I should tell you that you don't have to be a music nerd to appreciate this project.  It can be adapted to any shape and size. ****

The reason I tell you all of these things is so that you will understand why I chose a treble clef sign to decorate my music room with. 

On to the tutorial.  You will need:
Foam Core
Envirotex Pour on Resin 
Exacto Knife
Paint

I began by sketching a trable clef sign onto my foam core.  You can faintly see it in the photo.... if you squint.


Next, I painted the treble clef sign black.


You will then use your exacto knife to cut out the shape and then paint the sides.


The next step I don't have a picture for because I didn't want resin on my camera. (go figure)  But you just pour the Envirotex resin over the top of the foam core and then let it sit for like a couple of days. (Follow the directions on the box.  They are pretty easy to follow.)


Once it's dry, hang it up on the wall and enjoy.  I really love the way it turned out.

Pin It!

Wednesday, November 2, 2011

Fall Mantle

I know that Halloween is now over, but I realized that I never posted my updated mantle which also happens to have some holiday decor on it.  So I thought I would share it with you cause I am pretty excited about it. 

Here is what my mantle looked like last Halloween.


And this is how it looks now.


I decided to do some graphic art to modernize my front room a little. 


 I added a monogram and an owl and I loved the results. 


I really love the graphic pattern and I love that I can do so much paired with it on the mantle.  What do you think?
Pin It!

Tuesday, September 13, 2011

Inexpensive DIY Art

Remember my cabinet that I just finished?  Well, I wanted to make some artwork to go above it to add some color to the room as well as to give it a finished look.  I am so pleased with the way it turned out.  Here's what I did.


I took 3 pieces of MDF that I had left over from my clock project.  They measure 12X12 inches.  I used some turquiose paint and painted all of them.  Then I cut out a simple chevron stencil.  Here's where it got a little time consuming.  For some reason, I only could get one line of my stencil to look right when I was cutting it out.  So I had to trace and move the chevron stripe for the whole square.  Then I went back and painted the lines once they were all traced onto the board.  It may or may not have been the reason I only did one square with a pattern instetad of doing two like I had orginally thought I would.


After I had the striped painted on, I went over it with a black glaze which I think gives it a more weathered/textured look. 


To hang it on the wall, I hot glued some ribbon to the back and then hung them on some nails. 


 This is a really easy way to add personalized art work in your home for not a lot of cost.  Seriously.  I think this probably only cost me $2.00 to make all three.  Now go crazy and make some of your own!
Pin It!